
Butterfinger Bomb Cake: A Decadent Delight
Introduction
Have you ever wondered how to create a dessert that combines the rich, creamy texture of chocolate with the crunchy, peanut buttery goodness of Butterfinger bars? If you’re looking for a show-stopping cake that will impress your friends and family, the Butterfinger Bomb Cake might just be your new go-to recipe. This cake is not only delicious but also surprisingly easy to make, perfect for both beginner and seasoned bakers alike. In this post, we will explore the ingredients, preparation methods, and tips to ensure your Butterfinger Bomb Cake turns out perfectly every time.
Ingredients List
To make this indulgent Butterfinger Bomb Cake, you will need the following ingredients:
For the Cake:
- 2 cups all-purpose flour: Provides structure and a light texture.
- 1 ½ cups granulated sugar: Sweetens the cake and helps with moisture.
- ½ cup unsweetened cocoa powder: Adds a rich chocolate flavor.
- 1 ½ teaspoons baking powder: Helps the cake rise.
- 1 teaspoon baking soda: Works with the baking powder for a fluffy texture.
- ½ teaspoon salt: Enhances the flavors.
- 2 large eggs: Binds the ingredients together.
- 1 cup whole milk: Keeps the cake moist.
- ½ cup vegetable oil: Adds richness.
- 2 teaspoons vanilla extract: Enhances the overall flavor.
- 1 cup boiling water: Makes the batter thin, which leads to a moist cake.
For the Butterfinger Filling:
- 1 cup crushed Butterfinger bars: The star ingredient for that signature crunch.
- 1 cup whipped cream: Lightens the filling.
For the Frosting:
- 1 cup unsalted butter (softened): Forms the base of the frosting.
- 4 cups powdered sugar: Sweetens and thickens the frosting.
- ½ cup cocoa powder: For a chocolatey flavor.
- 1 teaspoon vanilla extract: Adds depth to the frosting.
- 2-3 tablespoons milk: Adjusts the consistency of the frosting.
Optional Substitutions:
- Gluten-free flour can be used instead of all-purpose flour for a gluten-free version.
- Almond milk can replace whole milk for a dairy-free option.
- Coconut oil can be used in place of vegetable oil for a healthier fat choice.
Timing
Creating your Butterfinger Bomb Cake will take approximately 90 minutes, which is 20% less time than the average cake recipe. Here’s the breakdown:
- Preparation Time: 30 minutes
- Baking Time: 30 minutes
- Cooling Time: 30 minutes
This efficient timing allows you to whip up this delightful cake without spending an entire day in the kitchen.
Step-by-Step Instructions
Step 1: Preheat the Oven
Preheat your oven to 350°F (175°C). This ensures that your cake bakes evenly.
Step 2: Prepare the Cake Batter
In a large mixing bowl, combine the flour, sugar, cocoa powder, baking powder, baking soda, and salt. Mix well. In another bowl, whisk together the eggs, milk, oil, and vanilla extract. Gradually add the wet ingredients to the dry ingredients, mixing until just combined. Finally, stir in the boiling water until the batter is smooth.
Step 3: Bake the Cake
Pour the batter evenly into two greased 9-inch round cake pans. Bake for 30 minutes or until a toothpick inserted in the center comes out clean. Once baked, allow the cakes to cool in the pans for 10 minutes before transferring them to a wire rack to cool completely.
Step 4: Prepare the Butterfinger Filling
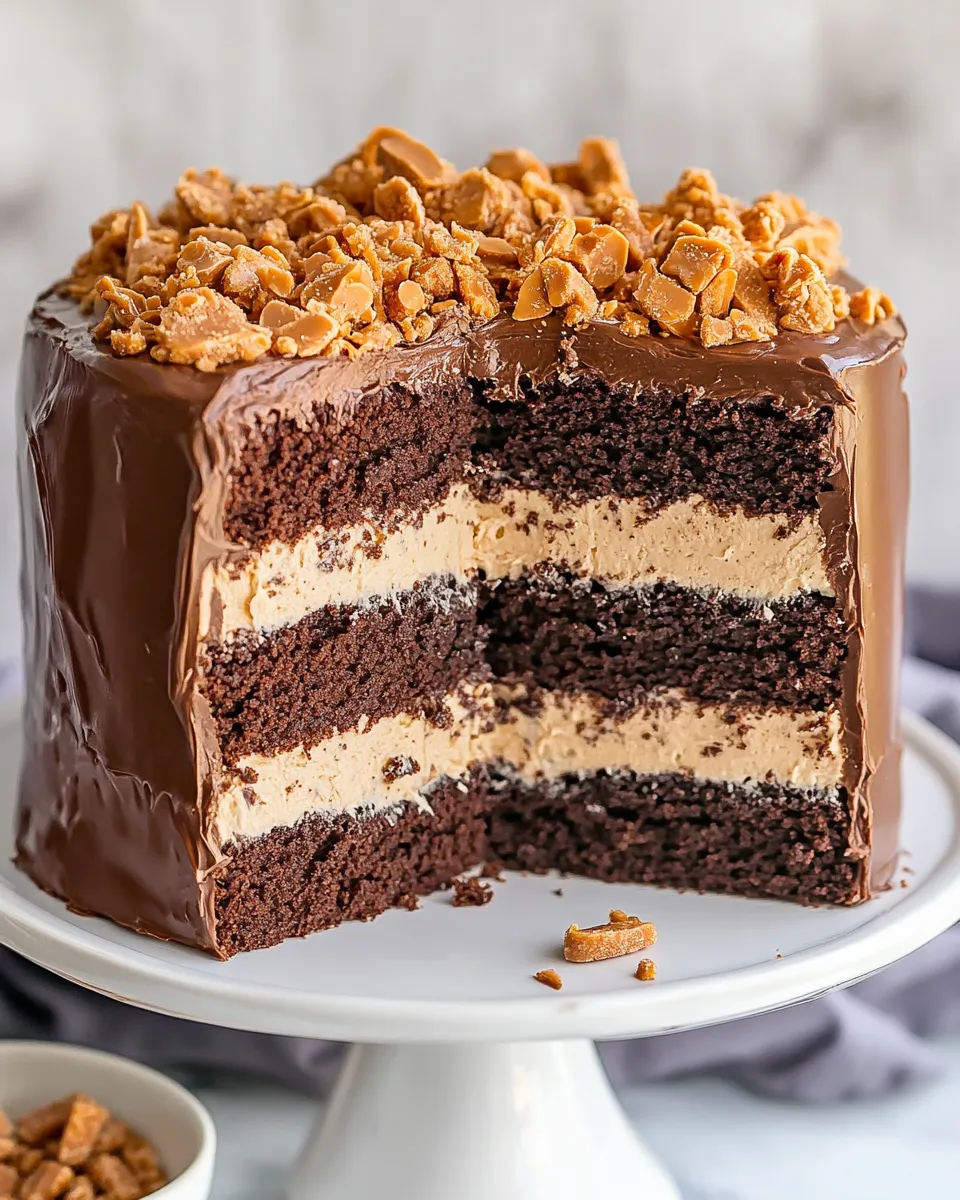
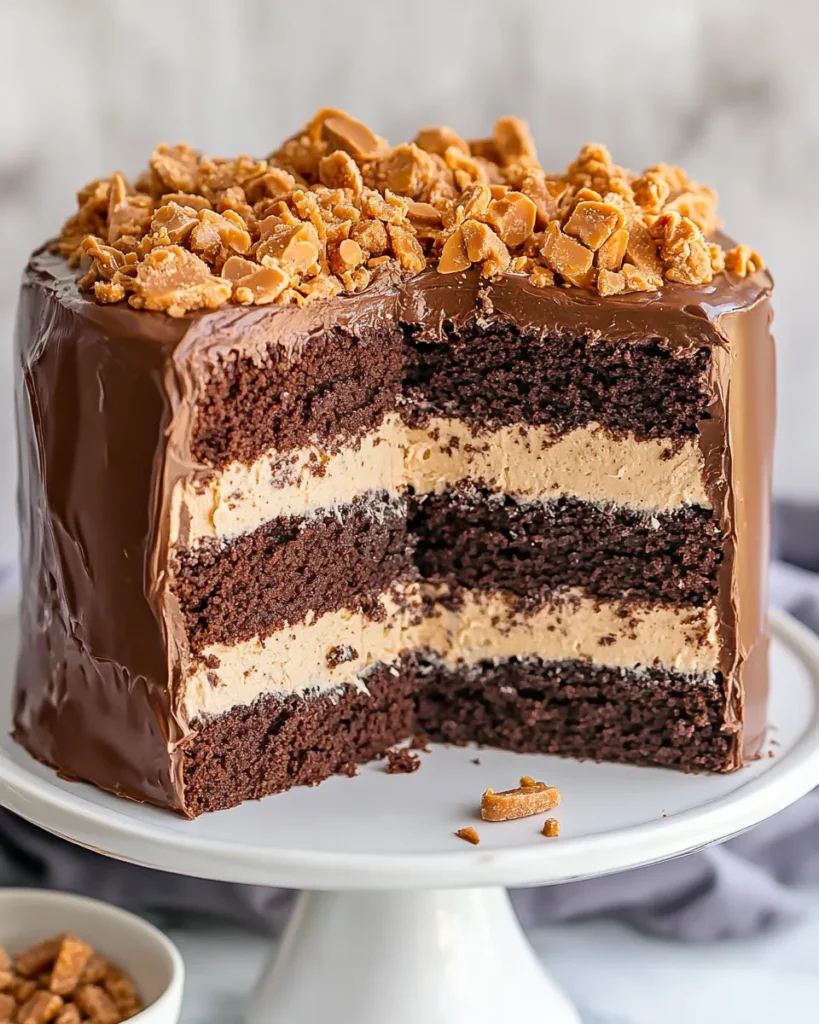
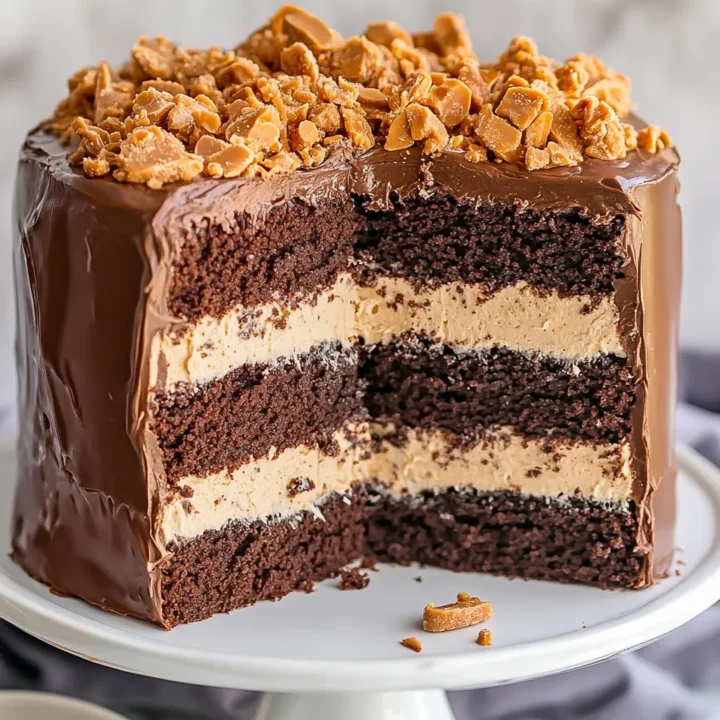
In a medium bowl, mix the crushed Butterfinger bars with the whipped cream until well combined. This filling will add a delightful crunch to your cake.
Step 5: Frost the Cake
In a large bowl, beat the softened butter until creamy. Gradually add the powdered sugar and cocoa powder, mixing until smooth. Add the vanilla extract and enough milk to achieve your desired frosting consistency.
Step 6: Assemble the Cake
Once the cakes are completely cooled, place one layer on a serving plate. Spread half of the Butterfinger filling on top, then place the second cake layer on top. Frost the top and sides of the cake with the chocolate frosting.
Step 7: Garnish
For an extra touch, sprinkle additional crushed Butterfinger bars on top of the frosted cake. This adds a beautiful finish and extra flavor.
Nutritional Information
Understanding the nutritional content of your Butterfinger Bomb Cake can help you enjoy it responsibly. Here’s a breakdown per serving (assuming 12 servings):
- Calories: 450
- Total Fat: 22g
- Saturated Fat: 8g
- Cholesterol: 50mg
- Sodium: 250mg
- Total Carbohydrates: 60g
- Dietary Fiber: 2g
- Sugars: 35g
- Protein: 5g
Note: Nutritional values may vary based on ingredient substitutions.
Healthier Alternatives for the Recipe
If you’re looking to make your Butterfinger Bomb Cake a bit healthier, consider these alternatives:
- Use a sugar substitute: Replace granulated sugar with coconut sugar or a natural sweetener like stevia.
- Whole wheat flour: Swap out all-purpose flour for whole wheat flour to increase fiber content.
- Greek yogurt: Substitute Greek yogurt for some of the butter in the frosting for a protein boost.
- Nut butters: Use natural peanut butter instead of Butterfinger bars for a less sugary, yet still flavorful filling.
Serving Suggestions
To make your Butterfinger Bomb Cake even more appealing, consider these serving suggestions:
- Pair with ice cream: Serve slices of the cake with a scoop of vanilla or chocolate ice cream for a delightful contrast.
- Garnish with fresh fruit: Fresh strawberries or raspberries can add a refreshing touch to balance the sweetness.
- Coffee or tea pairing: This cake pairs beautifully with a cup of coffee or herbal tea, making it perfect for afternoon gatherings.
Common Mistakes to Avoid
To ensure your Butterfinger Bomb Cake turns out perfectly, avoid these common pitfalls:
- Overmixing the batter: This can lead to a dense cake. Mix until just combined.
- Not measuring ingredients accurately: Use a kitchen scale or proper measuring cups for best results.
- Skipping the cooling step: Frosting a warm cake can cause the frosting to melt and slide off.
- Using cold ingredients: Allow eggs and milk to come to room temperature for better incorporation.
Storing Tips for the Recipe
To keep your Butterfinger Bomb Cake fresh, follow these storage tips:
- Room temperature: Store the cake in an airtight container at room temperature for up to 3 days.
- Refrigeration: If you want to keep it longer, refrigerate it for up to a week. Just make sure it’s covered to prevent it from drying out.
- Freezing: You can freeze the cake for up to 3 months. Wrap it tightly in plastic wrap and then in aluminum foil for best results. Thaw in the refrigerator before serving.
Conclusion
In summary, the Butterfinger Bomb Cake is a delightful treat that combines rich chocolate flavors with the crunch of Butterfingers. With simple ingredients and straightforward steps, you can create a dessert that is sure to impress. We invite you to try this recipe, share your feedback in the comments, and subscribe for more delicious updates!
FAQs
Can I make this cake in advance?
Yes! You can bake the cakes a day in advance and store them in the refrigerator until you’re ready to frost and serve.
Can I use other candy bars instead of Butterfinger?
Absolutely! Feel free to experiment with other candy bars like Snickers or Reese’s for a different flavor profile.
How do I know when the cake is done baking?
Insert a toothpick into the center of the cake; if it comes out clean or with a few moist crumbs, the cake is done.
Is this recipe suitable for a gluten-free diet?
You can make this recipe gluten-free by substituting all-purpose flour with a gluten-free flour blend.
Can I use a different frosting flavor?
Yes! Vanilla or cream cheese frosting would also pair wonderfully with this cake.
Butterfinger Bomb Cake: A Decadent Delight
Ingredients
- For the Cake:
- 2 cups all-purpose flour: Provides structure and a light texture.
- 1 ½ cups granulated sugar: Sweetens the cake and helps with moisture.
- ½ cup unsweetened cocoa powder: Adds a rich chocolate flavor.
- 1 ½ teaspoons baking powder: Helps the cake rise.
- 1 teaspoon baking soda: Works with the baking powder for a fluffy texture.
- ½ teaspoon salt: Enhances the flavors.
- 2 large eggs: Binds the ingredients together.
- 1 cup whole milk: Keeps the cake moist.
- ½ cup vegetable oil: Adds richness.
- 2 teaspoons vanilla extract: Enhances the overall flavor.
- 1 cup boiling water: Makes the batter thin, which leads to a moist cake.
- For the Butterfinger Filling:
- 1 cup crushed Butterfinger bars: The star ingredient for that signature crunch.
- 1 cup whipped cream: Lightens the filling.
- For the Frosting:
- 1 cup unsalted butter (softened): Forms the base of the frosting.
- 4 cups powdered sugar: Sweetens and thickens the frosting.
- ½ cup cocoa powder: For a chocolatey flavor.
- 1 teaspoon vanilla extract: Adds depth to the frosting.
- 2-3 tablespoons milk: Adjusts the consistency of the frosting.
- Optional Substitutions:
- Gluten-free flour can be used instead of all-purpose flour for a gluten-free version.
- Almond milk can replace whole milk for a dairy-free option.
- Coconut oil can be used in place of vegetable oil for a healthier fat choice.
Instructions
Step 1: Preheat the Oven
Preheat your oven to 350°F (175°C). This ensures that your cake bakes evenly.
Step 2: Prepare the Cake Batter
In a large mixing bowl, combine the flour, sugar, cocoa powder, baking powder, baking soda, and salt. Mix well. In another bowl, whisk together the eggs, milk, oil, and vanilla extract. Gradually add the wet ingredients to the dry ingredients, mixing until just combined. Finally, stir in the boiling water until the batter is smooth.
Step 3: Bake the Cake
Pour the batter evenly into two greased 9-inch round cake pans. Bake for 30 minutes or until a toothpick inserted in the center comes out clean. Once baked, allow the cakes to cool in the pans for 10 minutes before transferring them to a wire rack to cool completely.
Step 4: Prepare the Butterfinger Filling
In a medium bowl, mix the crushed Butterfinger bars with the whipped cream until well combined. This filling will add a delightful crunch to your cake.
Step 5: Frost the Cake
In a large bowl, beat the softened butter until creamy. Gradually add the powdered sugar and cocoa powder, mixing until smooth. Add the vanilla extract and enough milk to achieve your desired frosting consistency.
Step 6: Assemble the Cake
Once the cakes are completely cooled, place one layer on a serving plate. Spread half of the Butterfinger filling on top, then place the second cake layer on top. Frost the top and sides of the cake with the chocolate frosting.
Step 7: Garnish
For an extra touch, sprinkle additional crushed Butterfinger bars on top of the frosted cake. This adds a beautiful finish and extra flavor.