
Chocolate Dipped Oreos: A Decadent Delight
Introduction
Have you ever wondered how a simple cookie can transform into a gourmet treat with just a few extra ingredients? Chocolate dipped Oreos are not only a favorite for their delicious taste but also for their versatility and ease of preparation. This delightful recipe combines the classic Oreo cookie with rich chocolate, creating a sweet indulgence that’s perfect for any occasion. In this post, we’ll explore everything you need to know to make your own chocolate dipped Oreos, from ingredients to serving suggestions, ensuring you can impress friends and family with this delectable treat.
Ingredients List
To create your chocolate dipped Oreos, you will need the following ingredients:
- Oreos: 1 package (regular or double-stuffed)
- Chocolate Chips: 2 cups (semi-sweet or dark chocolate for a richer flavor)
- Coconut Oil: 1 tablespoon (optional, for a smoother chocolate coating)
- Sprinkles: For decoration (optional, choose your favorite colors)
- Nuts: Chopped (optional, for added crunch)
- Sea Salt: A pinch (optional, enhances flavor)
Substitutions:
- Vegan Option: Use vegan chocolate chips and coconut oil.
- Gluten-Free: Opt for gluten-free Oreos.
- Flavor Variations: Experiment with flavored chocolate (like mint or white chocolate) for a unique twist.
Timing
The total time to prepare and dip your Oreos is approximately 30 minutes, which is 20% less time than many other cookie recipes. Here’s the breakdown:
- Preparation Time: 10 minutes
- Dipping and Setting Time: 20 minutes
This quick timeline makes it easy to whip up a batch for unexpected guests or last-minute gatherings!
Step-by-Step Instructions
Step 1: Prepare Your Workspace
Start by gathering all your ingredients and tools. You’ll need a microwave-safe bowl, a baking sheet lined with parchment paper, and a fork for dipping.
Step 2: Melt the Chocolate
In a microwave-safe bowl, combine the chocolate chips and coconut oil (if using). Microwave in 30-second intervals, stirring in between, until fully melted and smooth. This usually takes about 1-2 minutes.
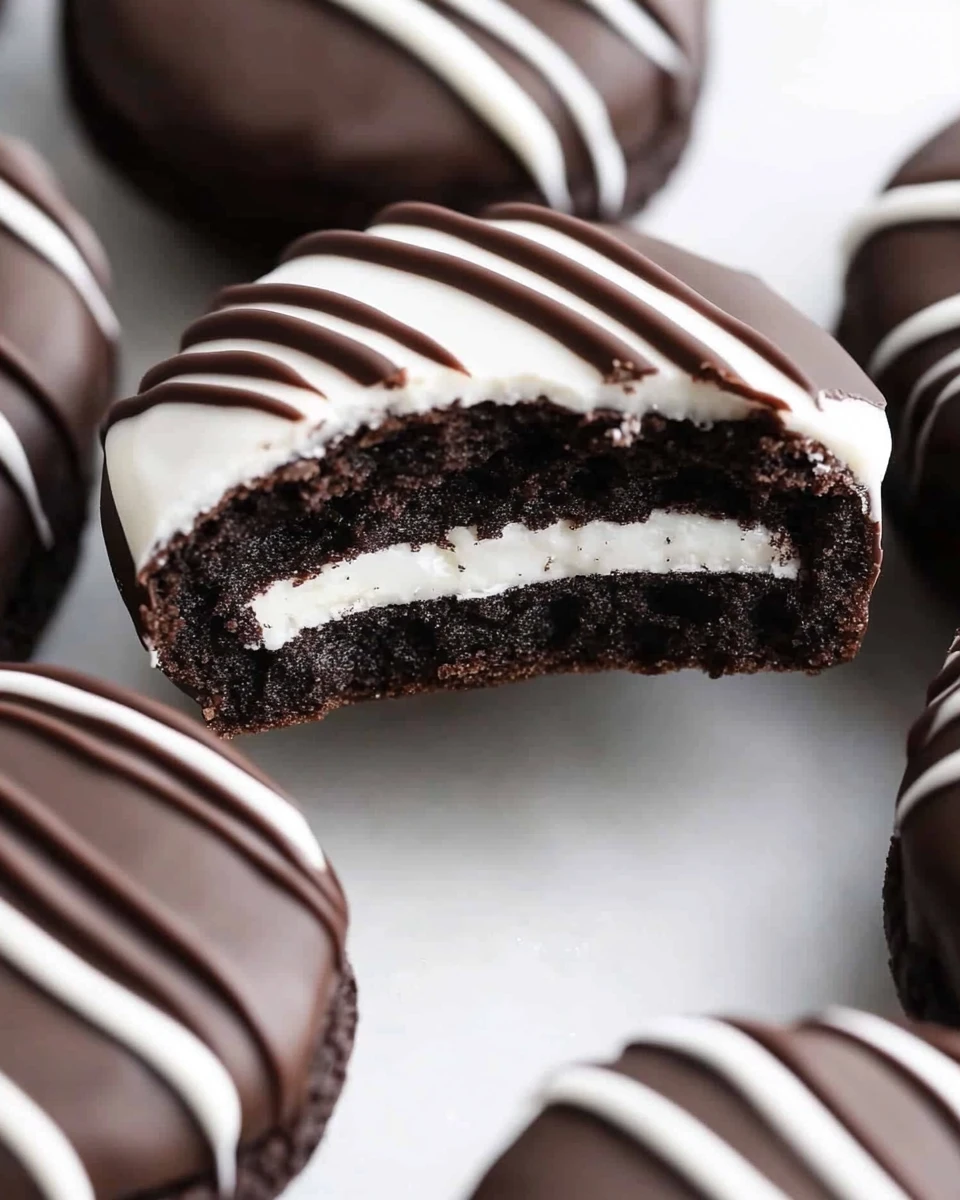
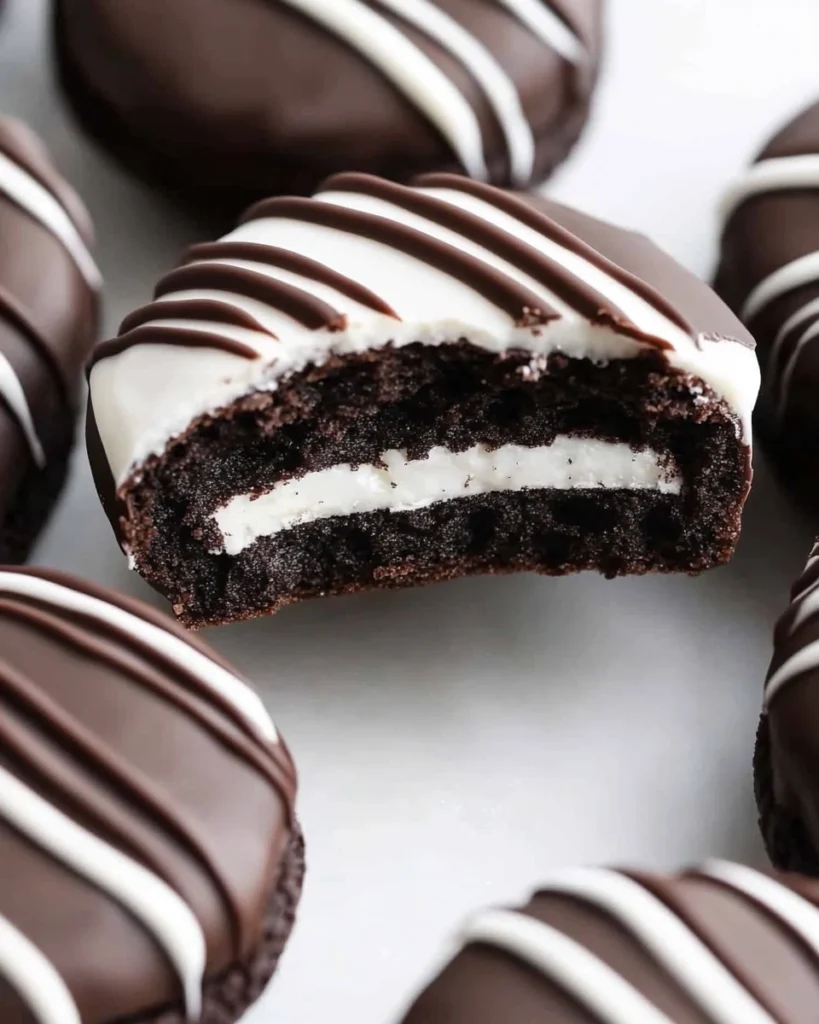
Step 3: Dip the Oreos
Using a fork, dip each Oreo into the melted chocolate, ensuring it is fully coated. Allow excess chocolate to drip off before placing it on the prepared baking sheet.
Step 4: Add Toppings
While the chocolate is still wet, sprinkle your desired toppings, such as sprinkles or chopped nuts. This step adds a fun visual appeal and extra texture.
Step 5: Let Them Set
Place the baking sheet in the refrigerator for about 15-20 minutes, or until the chocolate has hardened completely.
Step 6: Serve and Enjoy
Once set, your chocolate dipped Oreos are ready to be enjoyed! Serve them on a decorative plate for a beautiful presentation.
Nutritional Information
Here’s a quick look at the nutritional breakdown for one chocolate dipped Oreo (based on standard ingredients):
- Calories: 120
- Total Fat: 7g
- Saturated Fat: 4g
- Cholesterol: 0mg
- Sodium: 50mg
- Total Carbohydrates: 15g
- Dietary Fiber: 1g
- Sugars: 8g
- Protein: 1g
Note:
Nutritional values may vary based on ingredient choices and serving sizes.
Healthier Alternatives for the Recipe
If you’re looking to make your chocolate dipped Oreos a bit healthier, consider the following alternatives:
- Dark Chocolate: Use dark chocolate chips for a richer flavor and added antioxidants.
- Nut Butters: Instead of chocolate, try dipping Oreos in melted almond or peanut butter for a different flavor profile.
- Fruit Dips: Consider dipping Oreos in yogurt or melted fruit for a fresh twist.
These modifications can enhance the nutritional value while still keeping the treat delicious!
Serving Suggestions
Chocolate dipped Oreos can be enjoyed in various ways. Here are some creative serving suggestions:
- Dessert Platter: Arrange dipped Oreos on a platter alongside fresh fruit and other sweet treats for a colorful dessert spread.
- Gift Packaging: Package them in decorative boxes or bags for a thoughtful homemade gift.
- Ice Cream Sandwiches: Use two chocolate dipped Oreos to create an ice cream sandwich for an indulgent dessert.
- Party Favors: Wrap individual cookies in cellophane and tie with a ribbon for a fun party favor.
Common Mistakes to Avoid
When making chocolate dipped Oreos, avoid these common pitfalls:
- Not Melting Chocolate Properly: Overheating chocolate can cause it to seize. Always melt in short intervals and stir frequently.
- Skipping the Cooling Step: Don’t rush to eat them! Allowing them to set properly ensures the chocolate hardens nicely.
- Using Cold Oreos: Let your Oreos come to room temperature before dipping. Cold cookies can cause the chocolate to harden too quickly.
Storing Tips for the Recipe
To keep your chocolate dipped Oreos fresh, follow these storage tips:
- Room Temperature: Store in an airtight container at room temperature for up to one week.
- Refrigeration: For longer storage, keep them in the refrigerator for up to two weeks. Just be sure to separate layers with parchment paper to prevent sticking.
- Freezing: You can freeze chocolate dipped Oreos for up to three months. Just ensure they are well-wrapped to avoid freezer burn.
Conclusion
In summary, chocolate dipped Oreos are a delightful treat that can be made quickly and easily. With just a few ingredients, you can create a dessert that’s sure to impress. Try this recipe today, and don’t forget to share your creations in the comments below! Subscribe for more delicious recipes and updates.
FAQs
Q1: Can I use white chocolate instead of dark chocolate?
A1: Absolutely! White chocolate adds a sweet, creamy flavor that pairs wonderfully with Oreos.
Q2: How can I make my chocolate dipped Oreos look more decorative?
A2: Use colored sprinkles, drizzle contrasting chocolate on top, or even add edible glitter for a festive touch!
Q3: Can I make these ahead of time?
A3: Yes! You can prepare chocolate dipped Oreos a few days in advance and store them in an airtight container.
Q4: What’s the best way to melt chocolate without a microwave?
A4: Use a double boiler method by placing a heatproof bowl over a pot of simmering water, stirring until melted.
Q5: Are there any gluten-free options for Oreos?
A5: Yes, gluten-free Oreos are available and can be used as a substitute in this recipe.

Chocolate Dipped Oreos: A Decadent Delight
Ingredients
- Oreos: 1 package (regular or double-stuffed)
- Chocolate Chips: 2 cups (semi-sweet or dark chocolate for a richer flavor)
- Coconut Oil: 1 tablespoon (optional, for a smoother chocolate coating)
- Sprinkles: For decoration (optional, choose your favorite colors)
- Nuts: Chopped (optional, for added crunch)
- Sea Salt: A pinch (optional, enhances flavor)
- Substitutions:
- Vegan Option: Use vegan chocolate chips and coconut oil.
- Gluten-Free: Opt for gluten-free Oreos.
- Flavor Variations: Experiment with flavored chocolate (like mint or white chocolate) for a unique twist.
Instructions
Step 1: Prepare Your Workspace
Start by gathering all your ingredients and tools. You’ll need a microwave-safe bowl, a baking sheet lined with parchment paper, and a fork for dipping.
Step 2: Melt the Chocolate
In a microwave-safe bowl, combine the chocolate chips and coconut oil (if using). Microwave in 30-second intervals, stirring in between, until fully melted and smooth. This usually takes about 1-2 minutes.
Step 3: Dip the Oreos
Using a fork, dip each Oreo into the melted chocolate, ensuring it is fully coated. Allow excess chocolate to drip off before placing it on the prepared baking sheet.
Step 4: Add Toppings
While the chocolate is still wet, sprinkle your desired toppings, such as sprinkles or chopped nuts. This step adds a fun visual appeal and extra texture.
Step 5: Let Them Set
Place the baking sheet in the refrigerator for about 15-20 minutes, or until the chocolate has hardened completely.
Step 6: Serve and Enjoy
Once set, your chocolate dipped Oreos are ready to be enjoyed! Serve them on a decorative plate for a beautiful presentation.