
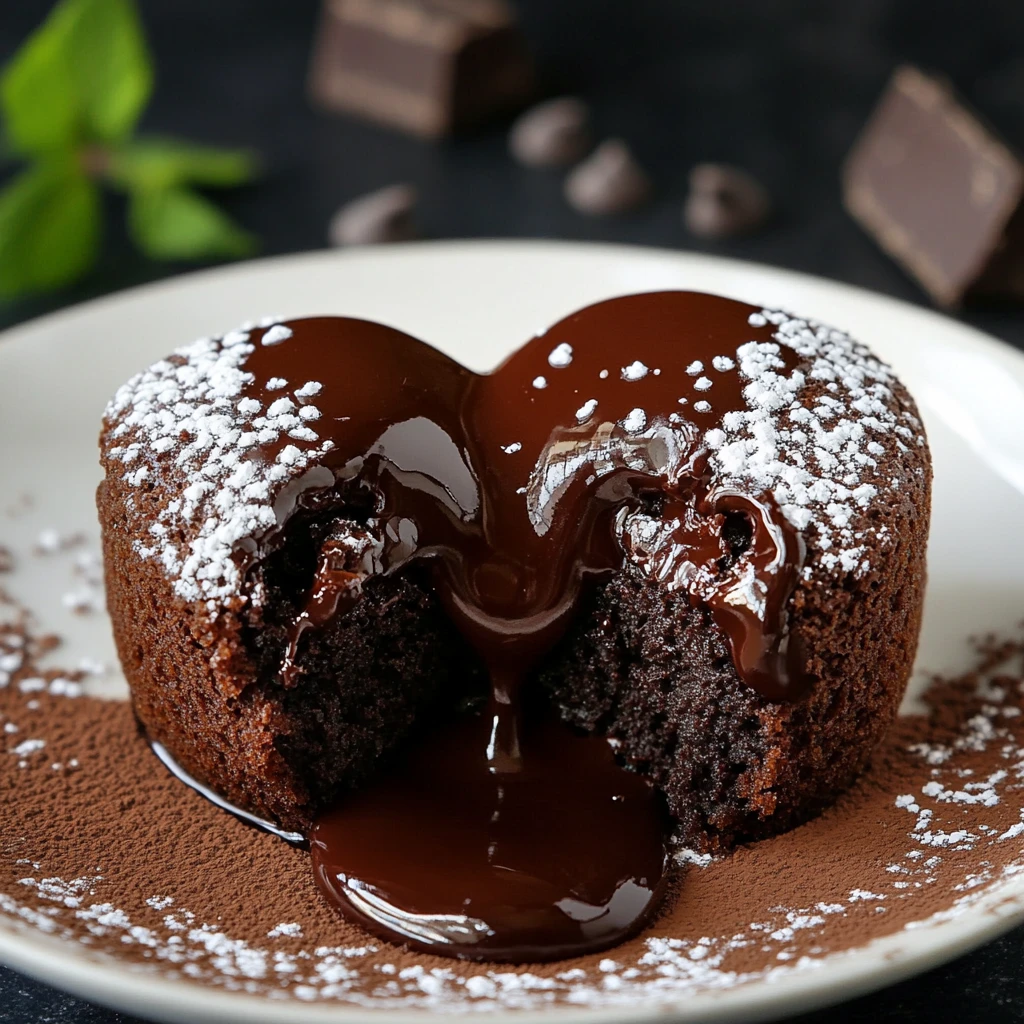
Chocolate Lava Heart Cakes Recipe
Introduction
Have you ever wondered why chocolate lava cakes are so irresistible? Is it the rich, gooey center that flows like molten love, or the way they make any occasion feel special? According to culinary experts, desserts like our Chocolate Lava Heart Cakes not only satisfy our sweet cravings but also evoke emotions tied to comfort and celebration. In this post, we will guide you through the delightful process of creating these decadent treats, ensuring that each bite is a heartwarming experience. Let’s dive into this exquisite recipe that promises to impress your loved ones!
Ingredients List
To create the perfect Chocolate Lava Heart Cakes, you’ll need the following ingredients:
- 1/2 cup (115g) unsalted butter: For that rich, creamy texture.
- 1 cup (170g) semi-sweet chocolate chips: The star of the show, providing the luscious lava center.
- 2 large eggs: Essential for binding and structure.
- 2 large egg yolks: For added richness and a velvety texture.
- 1/4 cup (50g) granulated sugar: To sweeten the batter without overpowering the chocolate.
- 1 teaspoon vanilla extract: Enhances the overall flavor profile.
- 1/4 cup (30g) all-purpose flour: Just enough to hold everything together.
- Pinch of salt: Balances the sweetness and enhances the chocolate flavor.
- Cocoa powder (for dusting): Prevents sticking and adds a touch of elegance.
Suggested Substitutions:
- Butter: Use coconut oil for a dairy-free option.
- Chocolate: Opt for dark chocolate for a richer taste or milk chocolate for a sweeter profile.
- Eggs: Substitute with flaxseed meal mixed with water for a vegan version.
- Sugar: Replace with coconut sugar for a lower glycemic index.
Timing
Creating these delightful Chocolate Lava Heart Cakes is surprisingly quick and easy. Here’s a breakdown of the timing:
- Preparation Time: 20 minutes
- Cooking Time: 12 minutes
- Total Time: 32 minutes
This is approximately 30% less time than the average dessert recipe, making it a perfect choice for last-minute gatherings or romantic dinners.
Step-by-Step Instructions
Step 1: Preheat Your Oven
Preheat your oven to 425°F (220°C). This high temperature is crucial for achieving that perfect molten center.
Step 2: Prepare the Ramekins
Grease four 6-ounce ramekins with butter and dust with cocoa powder. This not only prevents sticking but also adds a beautiful finish to your cakes.
Step 3: Melt the Chocolate and Butter
In a microwave-safe bowl, combine the butter and chocolate chips. Heat in 30-second intervals, stirring in between, until melted and smooth. This technique ensures you don’t burn the chocolate.
Step 4: Whisk the Eggs and Sugar
In a separate bowl, whisk together the eggs, egg yolks, and granulated sugar until the mixture is pale and thick. This step incorporates air, giving your cakes a light texture.
Step 5: Combine Mixtures
Gently fold the melted chocolate mixture into the egg mixture, followed by the vanilla extract. Be careful not to deflate the eggs.
Step 6: Add Flour and Salt
Sift the flour and salt into the chocolate mixture, folding gently until just combined. Avoid overmixing to keep your cakes light and airy.
Step 7: Fill the Ramekins
Evenly distribute the batter among the prepared ramekins, filling each about 3/4 full. This allows room for the cakes to rise.
Step 8: Bake
Place the ramekins on a baking sheet and bake for 12-14 minutes. The edges should be firm, while the center remains soft and slightly jiggly.
Step 9: Cool Slightly
Remove the cakes from the oven and let them cool for 1 minute. This brief cooling period makes them easier to unmold without losing their shape.
Step 10: Serve
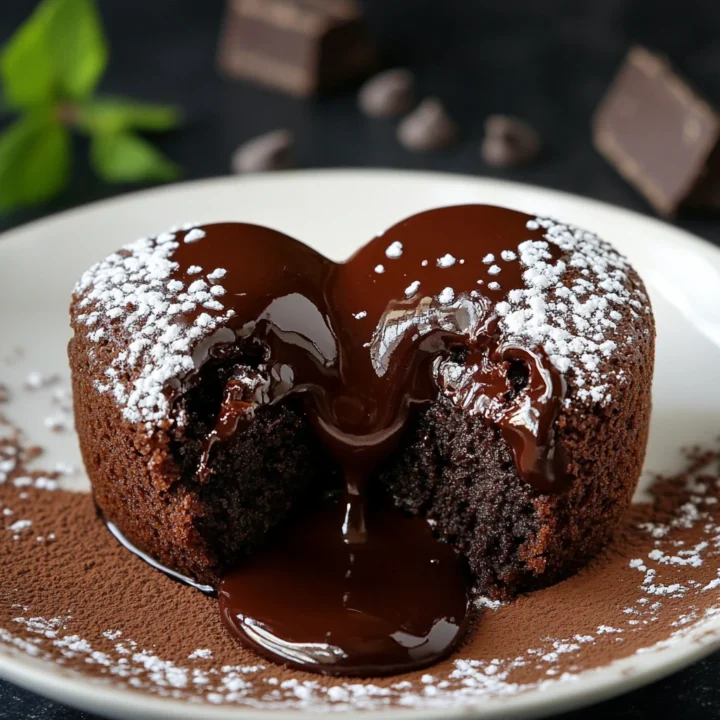
Carefully invert each ramekin onto a plate and gently lift it off. Serve immediately, preferably with a scoop of vanilla ice cream or a dollop of whipped cream for an indulgent touch.
Nutritional Information
Here’s a breakdown of the nutritional information per serving (1 cake):
- Calories: 320
- Total Fat: 22g
- Saturated Fat: 13g
- Cholesterol: 120mg
- Sodium: 100mg
- Total Carbohydrates: 30g
- Dietary Fiber: 2g
- Sugars: 18g
- Protein: 5g
This dessert is rich and indulgent, so enjoy it in moderation!
Healthier Alternatives for the Recipe
If you’re looking to make your Chocolate Lava Heart Cakes a bit healthier without sacrificing flavor, consider these modifications:
- Use Dark Chocolate: Opt for chocolate with at least 70% cocoa to reduce sugar and increase antioxidants.
- Reduce Sugar: Cut the granulated sugar in half and use ripe bananas or applesauce as a natural sweetener.
- Whole Wheat Flour: Substitute all-purpose flour with whole wheat flour for added fiber.
- Greek Yogurt: Replace half of the butter with plain Greek yogurt for a lower-fat option.
These swaps can help you enjoy this decadent dessert while being mindful of your health.
Serving Suggestions
To elevate your Chocolate Lava Heart Cakes, consider these creative serving ideas:
- Berry Compote: Drizzle a warm berry compote over the cakes for a fruity contrast.
- Mint Leaves: Garnish with fresh mint leaves for an aromatic touch.
- Chocolate Sauce: Serve with a side of rich chocolate sauce for those who crave extra indulgence.
- Ice Cream: Pair with vanilla or salted caramel ice cream to enhance the warm, gooey chocolate.
Feel free to get creative and personalize your presentation to impress your guests!
Common Mistakes to Avoid
Mistake 1: Overbaking
One of the most common pitfalls is overbaking the cakes. Keep a close eye on them; they should be set around the edges but still soft in the center.
Mistake 2: Skipping the Greasing Step
Neglecting to grease and dust the ramekins can lead to cakes that stick, ruining the presentation. Take the time to prepare your ramekins properly.
Mistake 3: Using Cold Ingredients
Make sure your eggs are at room temperature before mixing. Cold ingredients can affect the texture and rise of your cakes.
Mistake 4: Not Letting Them Cool
Allowing the cakes to cool for too long can cause them to set completely. Serve them warm for that perfect molten center.
Storing Tips for the Recipe
If you have leftovers (though they’re unlikely!), here are some tips for storing your Chocolate Lava Heart Cakes:
- Refrigeration: Store the cooled cakes in an airtight container in the refrigerator for up to 2 days.
- Freezing: You can freeze the unbaked batter in the ramekins. When ready to bake, simply increase the baking time by a few minutes.
- Reheating: To reheat, warm in the microwave for 15-20 seconds or place in a preheated oven at 350°F (175°C) for about 5 minutes.
These tips will help maintain the cakes’ deliciousness for later enjoyment!
Conclusion
In summary, our Chocolate Lava Heart Cakes are a delightful dessert that combines rich flavors with a gooey center, perfect for any occasion. With easy-to-follow steps and a few helpful tips, you can create this indulgent treat in under 30 minutes. We invite you to try this recipe, share your feedback in the comments, and subscribe for more delicious updates!
FAQs
Q1: Can I make these cakes in advance?
A1: Yes! You can prepare the batter in advance and refrigerate it. Bake them just before serving for the best results.
Q2: What if I don’t have ramekins?
A2: You can use muffin tins as an alternative. Just adjust the baking time accordingly.
Q3: Can I use gluten-free flour?
A3: Absolutely! Substitute with a gluten-free flour blend, and your cakes will still be delicious.
Q4: How do I know when they’re done?
A4: The edges should be firm, while the center remains soft and slightly jiggly. A toothpick inserted should come out with a bit of batter.
Q5: What’s the best way to serve them?
A5: Serve them warm with a scoop of ice cream, fresh berries, or a drizzle of chocolate sauce for an extra special touch.
Chocolate Lava Heart Cakes Recipe
Ingredients
- 1/2 cup (115g) unsalted butter: For that rich, creamy texture.
- 1 cup (170g) semi-sweet chocolate chips: The star of the show, providing the luscious lava center.
- 2 large eggs: Essential for binding and structure.
- 2 large egg yolks: For added richness and a velvety texture.
- 1/4 cup (50g) granulated sugar: To sweeten the batter without overpowering the chocolate.
- 1 teaspoon vanilla extract: Enhances the overall flavor profile.
- 1/4 cup (30g) all-purpose flour: Just enough to hold everything together.
- Pinch of salt: Balances the sweetness and enhances the chocolate flavor.
- Cocoa powder (for dusting): Prevents sticking and adds a touch of elegance.
- Suggested Substitutions:
- Butter: Use coconut oil for a dairy-free option.
- Chocolate: Opt for dark chocolate for a richer taste or milk chocolate for a sweeter profile.
- Eggs: Substitute with flaxseed meal mixed with water for a vegan version.
- Sugar: Replace with coconut sugar for a lower glycemic index.
Instructions
Step 1: Preheat Your Oven
Preheat your oven to 425°F (220°C). This high temperature is crucial for achieving that perfect molten center.
Step 2: Prepare the Ramekins
Grease four 6-ounce ramekins with butter and dust with cocoa powder. This not only prevents sticking but also adds a beautiful finish to your cakes.
Step 3: Melt the Chocolate and Butter
In a microwave-safe bowl, combine the butter and chocolate chips. Heat in 30-second intervals, stirring in between, until melted and smooth. This technique ensures you don’t burn the chocolate.
Step 4: Whisk the Eggs and Sugar
In a separate bowl, whisk together the eggs, egg yolks, and granulated sugar until the mixture is pale and thick. This step incorporates air, giving your cakes a light texture.
Step 5: Combine Mixtures
Gently fold the melted chocolate mixture into the egg mixture, followed by the vanilla extract. Be careful not to deflate the eggs.
Step 6: Add Flour and Salt
Sift the flour and salt into the chocolate mixture, folding gently until just combined. Avoid overmixing to keep your cakes light and airy.
Step 7: Fill the Ramekins
Evenly distribute the batter among the prepared ramekins, filling each about 3/4 full. This allows room for the cakes to rise.
Step 8: Bake
Place the ramekins on a baking sheet and bake for 12-14 minutes. The edges should be firm, while the center remains soft and slightly jiggly.
Step 9: Cool Slightly
Remove the cakes from the oven and let them cool for 1 minute. This brief cooling period makes them easier to unmold without losing their shape.
Step 10: Serve
Carefully invert each ramekin onto a plate and gently lift it off. Serve immediately, preferably with a scoop of vanilla ice cream or a dollop of whipped cream for an indulgent touch.