
Chocolate Peanut Butter Bars: A Delightful Treat
Introduction
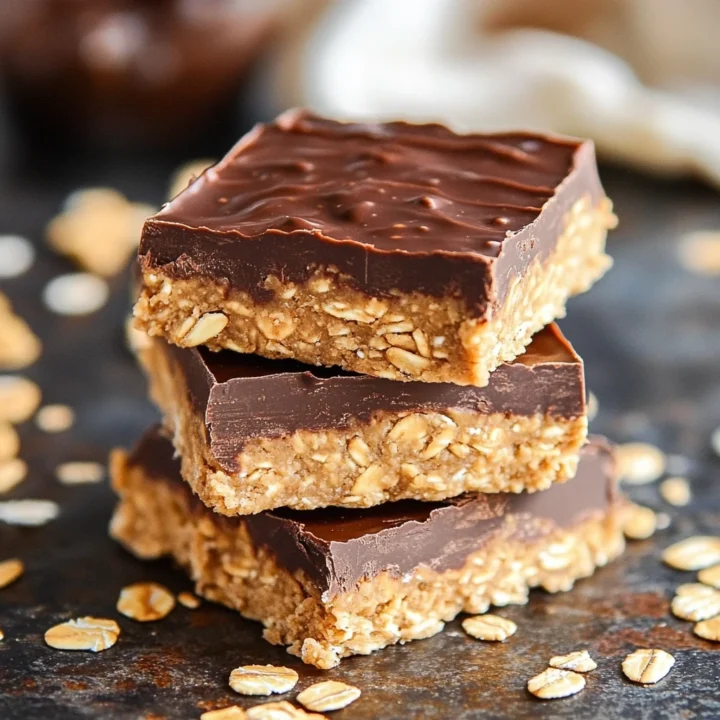
Are you searching for a delectable dessert that combines the rich flavors of chocolate and peanut butter? Look no further! Chocolate peanut butter bars are not just a treat; they represent a harmonious blend of taste and texture that can satisfy any sweet tooth. Did you know that chocolate and peanut butter are among the most popular flavor combinations in the United States? This blog post will guide you through a simple yet delicious recipe for chocolate peanut butter bars that will have your friends and family asking for seconds. Let’s dive into the world of these irresistible bars!
Ingredients List
To create your mouthwatering chocolate peanut butter bars, you’ll need the following ingredients:
- 1 cup creamy peanut butter (or almond butter for a nut-free alternative)
- 1 cup rolled oats (gluten-free oats for a gluten-free version)
- 1/2 cup honey (or maple syrup for a vegan option)
- 1/2 cup dark chocolate chips (semi-sweet or milk chocolate for a sweeter taste)
- 1/4 cup coconut oil (melted)
- 1/2 teaspoon vanilla extract
- Pinch of salt
Suggested Substitutions
- Nut Butter: Swap peanut butter for sun butter if you have nut allergies.
- Sweeteners: Use agave syrup instead of honey for a plant-based sweetener.
- Chocolate: Try white chocolate chips for a different flavor profile.
Timing
Preparing these chocolate peanut butter bars is a breeze! Here’s a breakdown of the timing:
- Preparation Time: 15 minutes
- Cooking Time: 15 minutes
- Total Time: 30 minutes
This is approximately 30% less time than the average dessert recipe, making it a quick and satisfying option for any occasion!
Step-by-Step Instructions
Step 1: Prepare the Pan
Start by lining an 8×8-inch baking pan with parchment paper, leaving some overhang on the sides for easy removal later. This simple step ensures your bars come out perfectly without sticking.
Step 2: Mix the Ingredients
In a medium bowl, combine the creamy peanut butter, honey, melted coconut oil, and vanilla extract. Stir until the mixture is smooth and well blended. This creates a luscious base for your bars.
Step 3: Add the Dry Ingredients
Next, add the rolled oats and a pinch of salt to the wet mixture. Stir until everything is evenly combined. The oats will give the bars a delightful chewy texture that complements the creamy peanut butter.
Step 4: Incorporate the Chocolate Chips
Gently fold in the dark chocolate chips. Feel free to reserve a few for topping the bars later for an extra touch of indulgence.
Step 5: Transfer to the Pan
Pour the mixture into the prepared baking pan. Use a spatula to press it down evenly, ensuring it’s tightly packed. This step is crucial for achieving the perfect texture.
Step 6: Chill and Set
Place the pan in the refrigerator for at least 2 hours, or until the bars are firm. This chilling time allows the flavors to meld beautifully and makes cutting them easier.
Step 7: Slice and Serve
Once set, lift the bars out of the pan using the parchment overhang. Cut them into squares or rectangles, and enjoy! You can serve them chilled or at room temperature, depending on your preference.
Nutritional Information

Here’s a detailed look at the nutritional content per serving (based on 16 servings):
- Calories: 180
- Protein: 5g
- Fat: 10g
- Carbohydrates: 20g
- Fiber: 2g
- Sugar: 8g
Nutritional Insights
These bars are not only delicious but also packed with nutrients from the peanut butter and oats, providing a good source of protein and fiber.
Healthier Alternatives for the Recipe
If you’re looking to make your chocolate peanut butter bars even healthier, consider the following modifications:
- Reduce Sugar: Cut down the honey to 1/3 cup for a less sweet option.
- Add Protein: Mix in a scoop of protein powder to increase the protein content.
- Use Dark Chocolate: Opt for dark chocolate with at least 70% cacao for added antioxidants.
Serving Suggestions
These chocolate peanut butter bars are versatile and can be served in various ways:
- Pair with Fruit: Serve alongside fresh strawberries or banana slices for a refreshing contrast.
- Top with Yogurt: Add a dollop of Greek yogurt for a creamy texture and extra protein.
- Drizzle with Honey: A light drizzle of honey can enhance the sweetness and presentation.
Common Mistakes to Avoid
- Not Melting the Coconut Oil: Ensure the coconut oil is melted before mixing; otherwise, it won’t blend well with the other ingredients.
- Skipping the Refrigeration: Don’t skip the chilling step! It’s essential for the bars to hold their shape.
- Overmixing: Mix just until combined; overmixing can lead to dense bars.
Storing Tips for the Recipe
To keep your chocolate peanut butter bars fresh:
- Refrigerate: Store in an airtight container in the refrigerator for up to 1 week.
- Freeze: For longer storage, wrap individual bars in plastic wrap and freeze for up to 3 months. Thaw in the refrigerator before enjoying.
Conclusion
In summary, these chocolate peanut butter bars are a quick, easy, and delicious treat that everyone will love. With simple ingredients and minimal prep time, you can whip up a batch in no time. We invite you to try this recipe, share your thoughts in the comments, and subscribe for more delicious updates!
FAQs
Can I use crunchy peanut butter instead of creamy?
Absolutely! Crunchy peanut butter will add an extra texture to your bars, making them even more delightful.
How do I make these bars vegan?
Simply substitute honey with maple syrup or agave nectar, and ensure that your chocolate chips are dairy-free.
Can I add other ingredients?
Yes! Feel free to mix in nuts, seeds, or dried fruit to customize your bars to your liking.
What if I don’t have coconut oil?
You can use unsalted butter or another neutral oil as a substitute for coconut oil.
How can I make these bars gluten-free?
Just ensure you use certified gluten-free oats, and you’ll have a delicious gluten-free treat!
Chocolate Peanut Butter Bars: A Delightful Treat
Ingredients
- 1 cup creamy peanut butter (or almond butter for a nut-free alternative)
- 1 cup rolled oats (gluten-free oats for a gluten-free version)
- 1/2 cup honey (or maple syrup for a vegan option)
- 1/2 cup dark chocolate chips (semi-sweet or milk chocolate for a sweeter taste)
- 1/4 cup coconut oil (melted)
- 1/2 teaspoon vanilla extract
- Pinch of salt
- Suggested Substitutions
- Nut Butter: Swap peanut butter for sun butter if you have nut allergies.
- Sweeteners: Use agave syrup instead of honey for a plant-based sweetener.
- Chocolate: Try white chocolate chips for a different flavor profile.
Instructions
Step 1: Prepare the Pan
Start by lining an 8x8-inch baking pan with parchment paper, leaving some overhang on the sides for easy removal later. This simple step ensures your bars come out perfectly without sticking.
Step 2: Mix the Ingredients
In a medium bowl, combine the creamy peanut butter, honey, melted coconut oil, and vanilla extract. Stir until the mixture is smooth and well blended. This creates a luscious base for your bars.
Step 3: Add the Dry Ingredients
Next, add the rolled oats and a pinch of salt to the wet mixture. Stir until everything is evenly combined. The oats will give the bars a delightful chewy texture that complements the creamy peanut butter.
Step 4: Incorporate the Chocolate Chips
Gently fold in the dark chocolate chips. Feel free to reserve a few for topping the bars later for an extra touch of indulgence.
Step 5: Transfer to the Pan
Pour the mixture into the prepared baking pan. Use a spatula to press it down evenly, ensuring it’s tightly packed. This step is crucial for achieving the perfect texture.
Step 6: Chill and Set
Place the pan in the refrigerator for at least 2 hours, or until the bars are firm. This chilling time allows the flavors to meld beautifully and makes cutting them easier.
Step 7: Slice and Serve
Once set, lift the bars out of the pan using the parchment overhang. Cut them into squares or rectangles, and enjoy! You can serve them chilled or at room temperature, depending on your preference.