

Chocolate Thumbprint Cookies Recipe
Introduction
Have you ever wondered what makes a cookie truly irresistible? Is it the rich flavor, the perfect texture, or perhaps the delightful surprise of a gooey filling? If you’re a cookie lover, you’re in for a treat! Today, we’ll dive into the world of Chocolate Thumbprint Cookies, a delightful blend of soft, chocolatey goodness with a luscious filling that will tantalize your taste buds. This recipe not only satisfies your sweet tooth but also allows you to impress friends and family with your baking skills.
Why Chocolate Thumbprint Cookies?
Chocolate thumbprint cookies are not just any cookies; they are a celebration of flavors and textures. With a melt-in-your-mouth chocolate base and a filling that can be customized to your liking—think caramel, jam, or even Nutella—these cookies are versatile and delightful. Plus, they are surprisingly easy to make! Let’s explore how to create these delectable treats step by step.
Ingredients List
To make your own batch of chocolate thumbprint cookies, you’ll need the following ingredients:
- 1 cup unsalted butter, softened
- 1 cup granulated sugar
- 1 cup brown sugar, packed
- 2 large eggs
- 2 teaspoons vanilla extract
- 3 cups all-purpose flour
- 1 cup unsweetened cocoa powder
- 1 teaspoon baking powder
- ½ teaspoon salt
- 1 cup chocolate chips (for the filling)
- Optional fillings: fruit jam, caramel sauce, or peanut butter
Ingredient Substitutions
- Butter: You can use coconut oil or a vegan butter substitute for a dairy-free version.
- Sugar: For a healthier option, try using coconut sugar or a sugar substitute like stevia.
- Flour: Whole wheat flour can be used for added nutrition, though it may alter the texture slightly.
Timing
Creating these delightful cookies is not only fun but also efficient. Here’s the breakdown of the time required:
- Preparation time: 20 minutes
- Cooking time: 12-15 minutes
- Total time: Approximately 35-40 minutes
This is about 20% less time than the average cookie recipe, allowing you to enjoy your treats faster!
Step-by-Step Instructions
Step 1: Preheat the Oven
Preheat your oven to 350°F (175°C). This ensures that your cookies bake evenly and achieve that perfect texture.
Step 2: Cream the Butter and Sugars
In a large mixing bowl, combine the softened butter, granulated sugar, and brown sugar. Use an electric mixer on medium speed until the mixture is light and fluffy, about 3-5 minutes. This step is crucial for incorporating air into the dough, resulting in a tender cookie.
Step 3: Add Eggs and Vanilla
Beat in the eggs one at a time, ensuring each is fully incorporated before adding the next. Stir in the vanilla extract. The eggs add moisture and richness, while the vanilla enhances the overall flavor.
Step 4: Combine Dry Ingredients
In a separate bowl, whisk together the flour, cocoa powder, baking powder, and salt. Gradually add this dry mixture to the wet ingredients, mixing just until combined. Be careful not to overmix, as this can lead to tough cookies.
Step 5: Chill the Dough
Cover the dough with plastic wrap and refrigerate for at least 30 minutes. Chilling helps the dough firm up, making it easier to shape into balls.
Step 6: Shape the Cookies
Once chilled, scoop out tablespoons of dough and roll them into balls. Place them on a baking sheet lined with parchment paper, spacing them about 2 inches apart.
Step 7: Create the Thumbprint
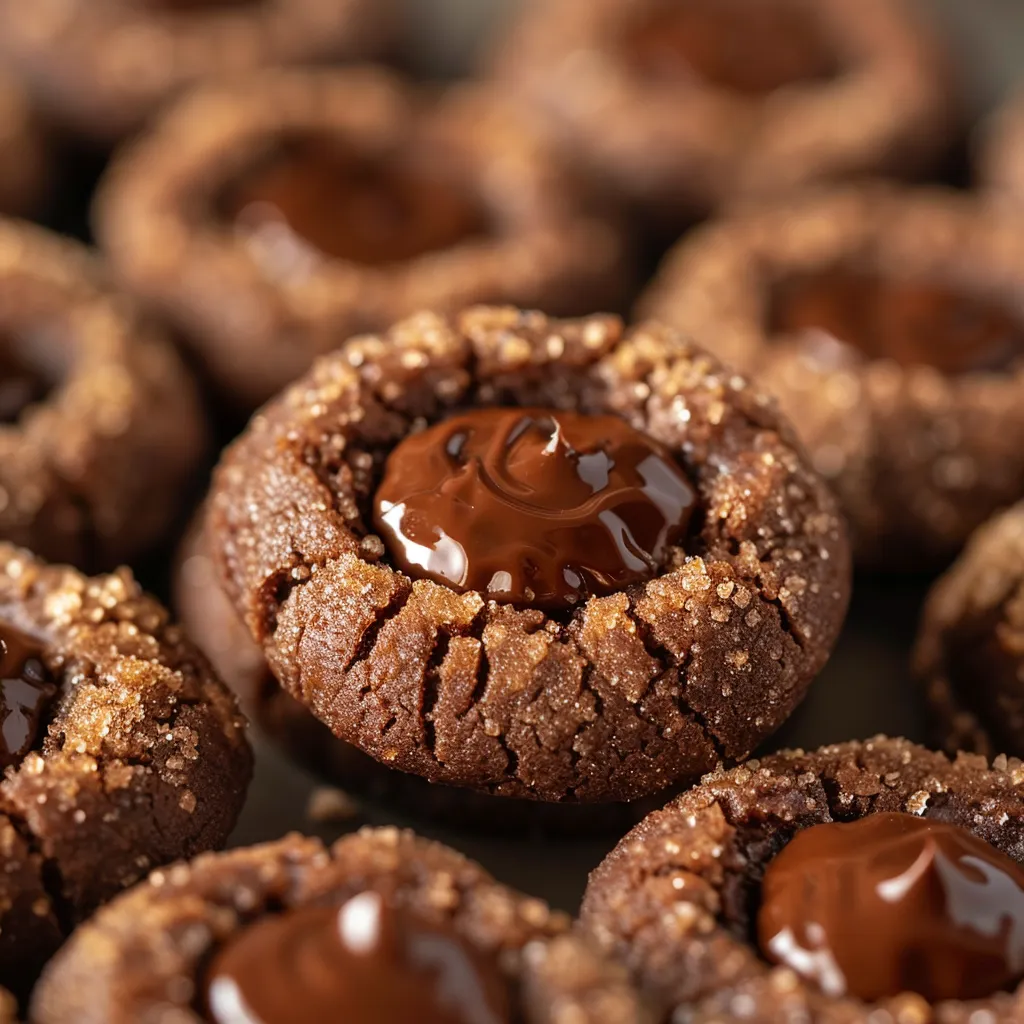
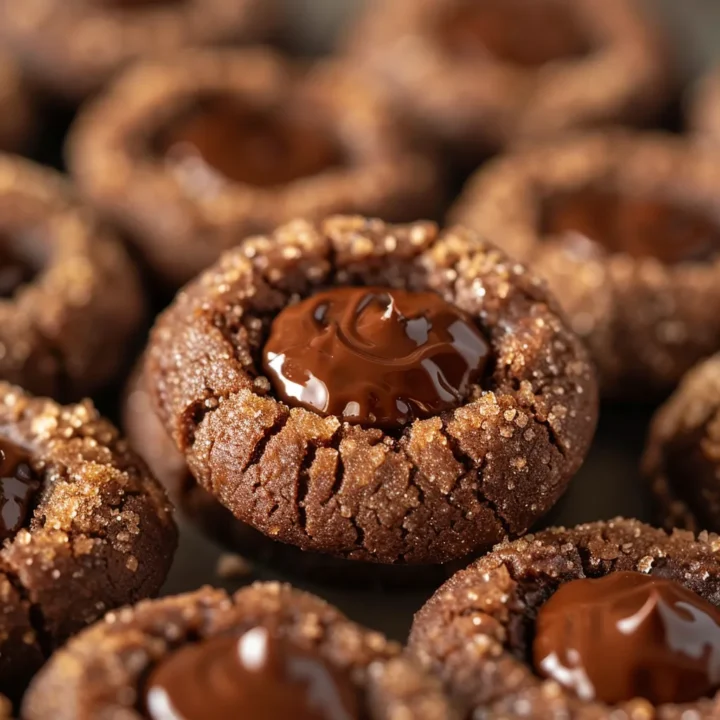
Using your thumb or the back of a spoon, gently press down in the center of each dough ball to create a small indentation. This is where the filling will go!
Step 8: Bake the Cookies
Bake in the preheated oven for 12-15 minutes. The cookies should look set but slightly soft in the center. They will continue to firm up as they cool.
Step 9: Add the Filling
Remove the cookies from the oven and immediately fill each thumbprint with your chosen filling (chocolate chips, jam, etc.). Allow them to cool on the baking sheet for a few minutes before transferring them to a wire rack to cool completely.
Nutritional Information
Here’s a quick overview of the nutritional content per cookie (based on a batch of 24 cookies):
- Calories: 150
- Total Fat: 8g
- Saturated Fat: 5g
- Cholesterol: 30mg
- Sodium: 60mg
- Total Carbohydrates: 18g
- Dietary Fiber: 1g
- Sugars: 10g
- Protein: 2g
Data Insights
According to the USDA, homemade cookies can have significantly fewer preservatives and additives than store-bought options, making them a healthier choice for your family.
Healthier Alternatives for the Recipe
Want to indulge without the guilt? Here are some tips to make your chocolate thumbprint cookies healthier:
- Use Whole Wheat Flour: Swap half or all of the all-purpose flour for whole wheat flour for added fiber.
- Reduce Sugar: Cut down on sugar by 25% without significantly affecting taste. Consider using natural sweeteners like honey or maple syrup.
- Add Nuts: Incorporate chopped nuts into the dough for added protein and healthy fats.
- Use Dark Chocolate: Opt for dark chocolate chips for a richer flavor and health benefits.
Serving Suggestions
These chocolate thumbprint cookies are perfect for various occasions:
- Tea Parties: Serve alongside a selection of teas for a delightful afternoon treat.
- Holiday Gatherings: Decorate with festive sprinkles or drizzles of white chocolate for a seasonal touch.
- Gifts: Package them in a decorative box as a thoughtful homemade gift.
Personal Tips
For an extra touch, consider dusting the finished cookies with powdered sugar or serving them with a scoop of vanilla ice cream for an indulgent dessert.
Common Mistakes to Avoid
- Skipping the Chilling Step: Not chilling the dough can result in cookies that spread too much during baking. Always chill for at least 30 minutes.
- Overmixing the Dough: Mixing too long can lead to tough cookies. Mix just until combined.
- Not Preheating the Oven: Baking in a cold oven can lead to uneven baking. Always preheat!
- Filling Too Early: Adding the filling before baking can cause it to overflow. Wait until the cookies are out of the oven.
Storing Tips for the Recipe
To keep your chocolate thumbprint cookies fresh:
- Room Temperature: Store in an airtight container at room temperature for up to one week.
- Refrigeration: For longer storage, keep them in the fridge for up to two weeks.
- Freezing: Freeze baked cookies in a single layer, then transfer to a freezer-safe bag for up to three months. Thaw at room temperature before serving.
Conclusion
In summary, chocolate thumbprint cookies are a delightful treat that combines rich chocolate flavor with customizable fillings, making them perfect for any occasion. With simple ingredients and easy steps, you can create a batch that will impress everyone.
Call to Action
Try this recipe today, and don’t forget to share your feedback in the comments below! We’d love to hear how your cookies turned out. Subscribe for more delicious recipes and updates!
FAQs
What can I use instead of chocolate chips for the filling?
You can use fruit jams, caramel sauce, peanut butter, or even a combination of these for a unique flavor.
Can I make the dough ahead of time?
Yes! You can prepare the dough and refrigerate it for up to 3 days before baking.
Are there gluten-free options for this recipe?
Absolutely! Substitute the all-purpose flour with a gluten-free flour blend to make this recipe gluten-free.
How do I know when the cookies are done baking?
The cookies should look set around the edges but still soft in the center. They will firm up as they cool.
Can I add nuts to the cookie dough?
Yes! Chopped nuts can be added to the dough for added crunch and flavor. Just be sure to adjust the amount of flour if necessary.
Chocolate Thumbprint Cookies Recipe
Ingredients
- 1 cup unsalted butter, softened
- 1 cup granulated sugar
- 1 cup brown sugar, packed
- 2 large eggs
- 2 teaspoons vanilla extract
- 3 cups all-purpose flour
- 1 cup unsweetened cocoa powder
- 1 teaspoon baking powder
- ½ teaspoon salt
- 1 cup chocolate chips (for the filling)
- Optional fillings: fruit jam, caramel sauce, or peanut butter
Instructions
Step 1: Preheat the Oven
Preheat your oven to 350°F (175°C). This ensures that your cookies bake evenly and achieve that perfect texture.
Step 2: Cream the Butter and Sugars
In a large mixing bowl, combine the softened butter, granulated sugar, and brown sugar. Use an electric mixer on medium speed until the mixture is light and fluffy, about 3-5 minutes. This step is crucial for incorporating air into the dough, resulting in a tender cookie.
Step 3: Add Eggs and Vanilla
Beat in the eggs one at a time, ensuring each is fully incorporated before adding the next. Stir in the vanilla extract. The eggs add moisture and richness, while the vanilla enhances the overall flavor.
Step 4: Combine Dry Ingredients
In a separate bowl, whisk together the flour, cocoa powder, baking powder, and salt. Gradually add this dry mixture to the wet ingredients, mixing just until combined. Be careful not to overmix, as this can lead to tough cookies.
Step 5: Chill the Dough
Cover the dough with plastic wrap and refrigerate for at least 30 minutes. Chilling helps the dough firm up, making it easier to shape into balls.
Step 6: Shape the Cookies
Once chilled, scoop out tablespoons of dough and roll them into balls. Place them on a baking sheet lined with parchment paper, spacing them about 2 inches apart.
Step 7: Create the Thumbprint
Using your thumb or the back of a spoon, gently press down in the center of each dough ball to create a small indentation. This is where the filling will go!
Step 8: Bake the Cookies
Bake in the preheated oven for 12-15 minutes. The cookies should look set but slightly soft in the center. They will continue to firm up as they cool.
Step 9: Add the Filling
Remove the cookies from the oven and immediately fill each thumbprint with your chosen filling (chocolate chips, jam, etc.). Allow them to cool on the baking sheet for a few minutes before transferring them to a wire rack to cool completely.