
Creamy Banana Pudding: A Delightful Dessert Recipe
Introduction
Did you know that banana pudding is one of the most beloved desserts in America, with its origins dating back to the 19th century? This creamy banana pudding recipe not only pays homage to this classic treat but also challenges the notion that making a delicious dessert requires hours in the kitchen. With our easy-to-follow guide, you’ll discover how to whip up a luscious, creamy banana pudding that’s sure to impress your family and friends. Let’s dive into this delightful recipe that combines the natural sweetness of ripe bananas with velvety pudding and crispy wafers.
Ingredients List
To create your creamy banana pudding, gather the following ingredients:
- 4 ripe bananas (the riper, the better for sweetness)
- 1 box (5.1 oz) vanilla instant pudding mix
- 2 cups cold milk (whole milk recommended for creaminess)
- 1 cup heavy cream (for that luxurious texture)
- 1/2 cup powdered sugar (adjust to taste)
- 1 teaspoon vanilla extract
- 1 box (11 oz) vanilla wafers (or substitute with graham crackers for a twist)
- Optional toppings: Whipped cream, chocolate shavings, or crushed nuts for added texture
This combination of ingredients creates a perfect balance of flavors and textures, ensuring each bite is a delightful experience.
Timing
Preparing this creamy banana pudding is a breeze! Here’s a breakdown of the time required:
- Preparation Time: 20 minutes
- Chilling Time: 2 hours (for optimal flavor)
- Total Time: 2 hours and 20 minutes
This means you can have this indulgent dessert ready in less time than it takes to watch a movie—about 20% less time than the average pudding recipe!
Step-by-Step Instructions
Step 1: Prepare the Pudding Base
In a large mixing bowl, whisk together the vanilla instant pudding mix and cold milk until smooth. This should take about 2 minutes. The mixture will thicken as you whisk, creating a creamy base for your pudding.
Step 2: Whip the Cream
In a separate bowl, use an electric mixer to beat the heavy cream until soft peaks form. Gradually add the powdered sugar and vanilla extract, continuing to beat until stiff peaks form. This whipped cream will add an airy texture to your pudding.
Step 3: Combine the Mixtures
Gently fold the whipped cream into the pudding mixture using a spatula. Be careful not to deflate the whipped cream; you want to maintain that light, fluffy texture.
Step 4: Layer the Pudding
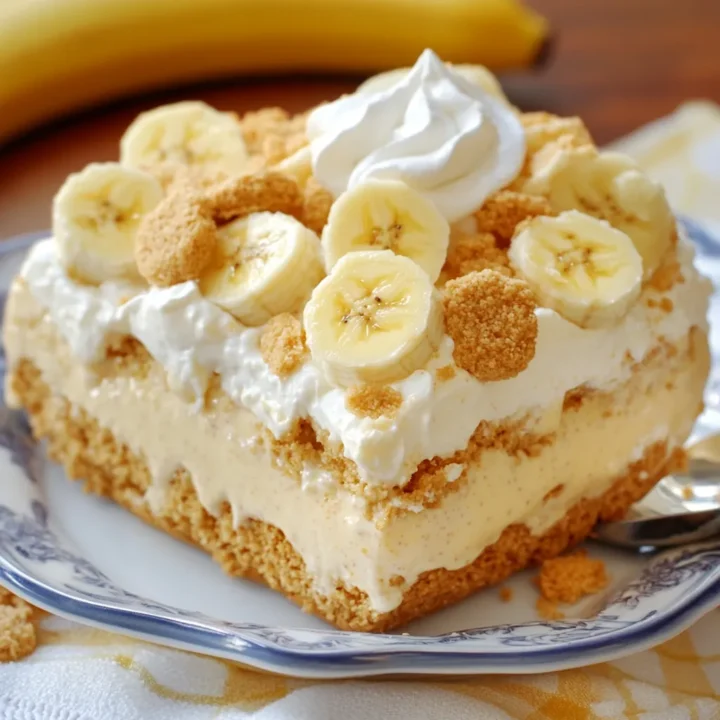
In a large serving dish or individual cups, start layering your ingredients. Begin with a layer of vanilla wafers, followed by a layer of the creamy pudding mixture, and then slices of ripe bananas. Repeat these layers until all ingredients are used, finishing with a layer of pudding on top.
Step 5: Chill and Serve
Cover the dish with plastic wrap and refrigerate for at least 2 hours. This chilling time allows the flavors to meld beautifully. When ready to serve, garnish with additional whipped cream, chocolate shavings, or crushed nuts for a delightful presentation.

Nutritional Information
Here’s a breakdown of the nutritional content per serving (based on 8 servings):
- Calories: 320
- Total Fat: 15g
- Saturated Fat: 8g
- Cholesterol: 50mg
- Sodium: 200mg
- Total Carbohydrates: 45g
- Dietary Fiber: 1g
- Sugars: 20g
- Protein: 4g
This creamy banana pudding is a treat that balances indulgence with moderate nutritional value, making it a delightful addition to any gathering.
Healthier Alternatives for the Recipe
If you’re looking to lighten up this creamy banana pudding without sacrificing flavor, consider these modifications:
- Use low-fat milk instead of whole milk and opt for light whipped cream.
- Substitute the vanilla instant pudding mix with a sugar-free version to reduce calories and sugar content.
- Replace powdered sugar with a natural sweetener like honey or maple syrup.
- Add chia seeds or flaxseeds for added fiber and omega-3 fatty acids without altering the taste significantly.
These healthier alternatives will help you enjoy this delicious dessert while aligning with various dietary preferences.
Serving Suggestions
Serve your creamy banana pudding in individual cups for an elegant touch, or present it in a large dish for a family-style dessert. Here are some creative serving suggestions:
- Top with fresh berries like strawberries or blueberries for a pop of color and added flavor.
- Drizzle with caramel sauce for a decadent twist.
- Add a sprinkle of cinnamon or nutmeg to enhance the flavor profile.
- Pair with a scoop of vanilla ice cream for an indulgent treat.
Feel free to get creative with your presentation to make this dessert even more appealing!
Common Mistakes to Avoid
Creating the perfect creamy banana pudding can be simple, but here are some common pitfalls to watch out for:
- Using underripe bananas: Ensure your bananas are ripe for maximum sweetness and flavor.
- Overmixing the whipped cream: Stop mixing as soon as you see stiff peaks to avoid a grainy texture.
- Not chilling long enough: Allowing the pudding to chill for at least 2 hours ensures the flavors meld together beautifully.
- Skipping the layering: Layering ingredients properly helps prevent the bananas from browning too quickly and keeps the texture appealing.
By avoiding these mistakes, you’ll create a stunning dessert that everyone will love.
Storing Tips for the Recipe
To maintain the freshness of your creamy banana pudding, follow these storage tips:
- Refrigerate leftovers in an airtight container for up to 3 days. The pudding may thicken slightly, but it will still taste delicious.
- Prevent banana browning by placing a layer of plastic wrap directly on the surface of the pudding before sealing the container.
- Prep ingredients ahead of time: You can prepare the pudding mixture and whipped cream separately, storing them in the fridge until you’re ready to layer and serve.
These practices will help you enjoy your dessert for days to come!
Conclusion
In summary, this creamy banana pudding recipe is a delightful blend of flavors and textures that is easy to prepare and sure to impress. With just a few simple ingredients and steps, you can create a dessert that brings joy to any gathering. We invite you to try this recipe, share your feedback in the comments below, and subscribe for more delicious updates!
FAQs
Can I use fresh bananas instead of instant pudding?
Yes, you can use fresh bananas, but instant pudding is recommended for its convenience and consistent texture.
How can I make this recipe gluten-free?
To make a gluten-free version, simply substitute vanilla wafers with gluten-free cookies or graham crackers.
Can I freeze the banana pudding?
While you can freeze the pudding, the texture may change upon thawing. It’s best enjoyed fresh or refrigerated.
What can I use instead of heavy cream?
You can substitute heavy cream with coconut cream or a dairy-free whipped topping for a lighter option.
How long does banana pudding last in the fridge?
Banana pudding will last in the refrigerator for up to 3 days. However, for the best taste and texture, consume it within the first 24 hours.
Creamy Banana Pudding: A Delightful Dessert Recipe
Ingredients
- 4 ripe bananas (the riper, the better for sweetness)
- 1 box (5.1 oz) vanilla instant pudding mix
- 2 cups cold milk (whole milk recommended for creaminess)
- 1 cup heavy cream (for that luxurious texture)
- 1/2 cup powdered sugar (adjust to taste)
- 1 teaspoon vanilla extract
- 1 box (11 oz) vanilla wafers (or substitute with graham crackers for a twist)
- Optional toppings: Whipped cream, chocolate shavings, or crushed nuts for added textur
Instructions
Step 1: Prepare the Pudding Base
In a large mixing bowl, whisk together the vanilla instant pudding mix and cold milk until smooth. This should take about 2 minutes. The mixture will thicken as you whisk, creating a creamy base for your pudding.
Step 2: Whip the Cream
In a separate bowl, use an electric mixer to beat the heavy cream until soft peaks form. Gradually add the powdered sugar and vanilla extract, continuing to beat until stiff peaks form. This whipped cream will add an airy texture to your pudding.
Step 3: Combine the Mixtures
Gently fold the whipped cream into the pudding mixture using a spatula. Be careful not to deflate the whipped cream; you want to maintain that light, fluffy texture.
Step 4: Layer the Pudding
In a large serving dish or individual cups, start layering your ingredients. Begin with a layer of vanilla wafers, followed by a layer of the creamy pudding mixture, and then slices of ripe bananas. Repeat these layers until all ingredients are used, finishing with a layer of pudding on top.
Step 5: Chill and Serve
Cover the dish with plastic wrap and refrigerate for at least 2 hours. This chilling time allows the flavors to meld beautifully. When ready to serve, garnish with additional whipped cream, chocolate shavings, or crushed nuts for a delightful presentation.