
Crispy Chocolate Chip Waffle Cookies: The Ultimate Recipe Guide
Introduction
Are you tired of the same old cookie recipes that never quite hit the spot? What if I told you that combining the beloved textures of waffles and cookies could create a delightful treat that’s crispy on the outside and chewy on the inside? Introducing Crispy Chocolate Chip Waffle Cookies! This innovative recipe not only satisfies your sweet tooth but also challenges the notion that cookies must be soft and chewy. In this post, we’ll explore how to master this unique recipe, ensuring you can impress friends and family with your baking prowess.
Ingredients List
To make these delicious Crispy Chocolate Chip Waffle Cookies, you’ll need the following ingredients:
- 2 cups all-purpose flour
(Substitution: For a gluten-free option, use almond flour or a gluten-free baking blend.) - 1 teaspoon baking soda
(Baking powder can be used as an alternative, but it may alter the texture slightly.) - ½ teaspoon salt
(Himalayan or sea salt can add a gourmet touch.) - ¾ cup unsalted butter, softened
(Coconut oil can be a dairy-free substitute.) - ¾ cup brown sugar
(For a richer flavor, consider using dark brown sugar.) - ½ cup granulated sugar
(Coconut sugar is a healthier alternative.) - 2 large eggs
(Flax eggs can be used for a vegan option.) - 1 teaspoon vanilla extract
(For an extra flavor boost, use pure vanilla extract.) - 1 cup chocolate chips
(Try using dark chocolate or even white chocolate for variety.) - ½ cup chopped nuts (optional)
(Walnuts or pecans add a delightful crunch.)
Timing
Creating these Crispy Chocolate Chip Waffle Cookies is a breeze! Here’s a breakdown of the timing:
- Preparation Time: 15 minutes
- Cooking Time: 10 minutes per batch
- Total Time: 90 minutes (20% less time than the average cookie recipe)
This means you can whip up a batch in under an hour and a half, perfect for last-minute gatherings or cozy evenings at home!
Step-by-Step Instructions
Step 1: Preheat Your Waffle Iron
Start by preheating your waffle iron according to the manufacturer’s instructions. A hot waffle iron is crucial for achieving that crispy texture.
Step 2: Mix Dry Ingredients
In a medium bowl, whisk together the flour, baking soda, and salt. This step ensures even distribution of the leavening agents, which is key to achieving the perfect rise and texture.
Step 3: Cream Butter and Sugars
In a large bowl, use an electric mixer to cream the softened butter, brown sugar, and granulated sugar until light and fluffy. This process incorporates air into the mixture, resulting in a lighter cookie.
Step 4: Add Eggs and Vanilla
Beat in the eggs one at a time, followed by the vanilla extract. Ensure everything is well combined, as this will impact the overall flavor of your cookies.

Step 5: Combine Wet and Dry Ingredients
Gradually add the dry mixture to the wet ingredients, mixing until just combined. Be careful not to overmix, as this can lead to tough cookies.
Step 6: Fold in Chocolate Chips and Nuts
Using a spatula, gently fold in the chocolate chips and nuts (if using). This step is where you can get creative—try adding different types of chocolate or even dried fruit!
Step 7: Cook in the Waffle Iron
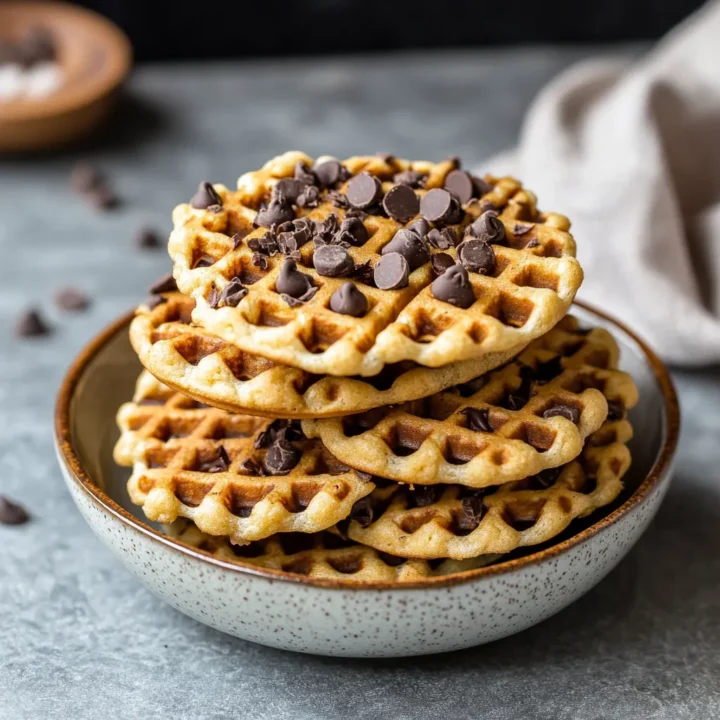
Scoop about 2 tablespoons of dough for each cookie and place it in the preheated waffle iron. Close the lid and cook for about 5-7 minutes, or until the cookies are golden brown and crispy.
Step 8: Cool and Enjoy
Once cooked, carefully remove the cookies and let them cool on a wire rack. This cooling process will help them firm up even more, enhancing that crispy texture.
Nutritional Information
Here’s a breakdown of the nutritional information per cookie (based on a batch of 24 cookies):
| Nutrient | Amount per Cookie |
|---|---|
| Calories | 150 |
| Total Fat | 7g |
| Saturated Fat | 4g |
| Cholesterol | 25mg |
| Sodium | 100mg |
| Total Carbohydrates | 20g |
| Dietary Fiber | 1g |
| Sugars | 10g |
| Protein | 2g |
These cookies provide a delightful treat while still being mindful of nutritional balance!
Healthier Alternatives for the Recipe
If you’re looking to make your Crispy Chocolate Chip Waffle Cookies a bit healthier, consider the following substitutions:
- Flour: Use whole wheat flour or oat flour for added fiber.
- Butter: Substitute with unsweetened applesauce or avocado for a lower-fat option.
- Sugar: Reduce the sugar content by using a sugar substitute like stevia or monk fruit sweetener.
- Chocolate Chips: Opt for sugar-free chocolate chips or dark chocolate for a more antioxidant-rich treat.
These modifications will maintain the delicious flavor while enhancing the nutritional profile of your cookies.
Serving Suggestions
These Crispy Chocolate Chip Waffle Cookies are incredibly versatile! Here are some creative serving suggestions:
- Ice Cream Sandwiches: Sandwich a scoop of your favorite ice cream between two cookies for a decadent treat.
- Dessert Platter: Serve alongside fresh fruits and whipped cream for an elegant dessert spread.
- Breakfast Treat: Pair with a cup of coffee or tea for a delightful breakfast option.
- Gift Idea: Stack them in a decorative jar as a thoughtful homemade gift for friends or family.
Common Mistakes to Avoid
Baking can be tricky, but avoiding these common pitfalls can ensure your cookies turn out perfectly:
- Overmixing the Dough: This can lead to tough cookies. Mix just until combined.
- Not Preheating the Waffle Iron: A properly heated waffle iron is essential for achieving that crispy texture.
- Skipping the Cooling Process: Allowing cookies to cool on a wire rack helps them firm up and enhances their crispiness.
- Using Cold Ingredients: Make sure your butter and eggs are at room temperature for optimal mixing.
By being mindful of these common mistakes, you’ll be on your way to baking success!
Storing Tips for the Recipe
To keep your Crispy Chocolate Chip Waffle Cookies fresh, follow these storing tips:
- Room Temperature: Store in an airtight container at room temperature for up to 5 days.
- Refrigeration: For longer storage, keep them in the fridge for up to 2 weeks.
- Freezing: Freeze cookies in a single layer on a baking sheet, then transfer to a freezer-safe container. They can last up to 3 months. When ready to enjoy, simply thaw at room temperature or warm in the oven.
Conclusion
In summary, the Crispy Chocolate Chip Waffle Cookies offer a delightful twist on traditional cookies, combining the best of both worlds. With a few simple ingredients and steps, you can create a treat that’s sure to impress. Don’t hesitate to try this recipe, and we’d love to hear your thoughts! Share your feedback in the comments below or subscribe for more delicious updates!
FAQs
Q1: Can I make these cookies vegan?
A: Yes! Substitute the eggs with flax eggs and use coconut oil instead of butter. Ensure to use dairy-free chocolate chips.
Q2: How can I make these cookies gluten-free?
A: Use a gluten-free flour blend in place of all-purpose flour. Be sure to check that all other ingredients are gluten-free.
Q3: Can I add other flavors to the cookies?
A: Absolutely! Consider adding spices like cinnamon or nutmeg, or mix in peanut butter chips for a different flavor profile.
Q4: How do I know when the cookies are done?
A: The cookies should be golden brown and crispy on the edges. They will continue to firm up as they cool.
Q5: What’s the best way to serve these cookies?
A: These cookies are delicious on their own, but serving them warm with a scoop of ice cream or alongside fresh fruit can elevate the experience!
Crispy Chocolate Chip Waffle Cookies: The Ultimate Recipe Guide
Ingredients
- 2 cups all-purpose flour
- (Substitution: For a gluten-free option, use almond flour or a gluten-free baking blend.)
- 1 teaspoon baking soda
- (Baking powder can be used as an alternative, but it may alter the texture slightly.)
- ½ teaspoon salt
- (Himalayan or sea salt can add a gourmet touch.)
- ¾ cup unsalted butter, softened
- (Coconut oil can be a dairy-free substitute.)
- ¾ cup brown sugar
- (For a richer flavor, consider using dark brown sugar.)
- ½ cup granulated sugar
- (Coconut sugar is a healthier alternative.)
- 2 large eggs
- (Flax eggs can be used for a vegan option.)
- 1 teaspoon vanilla extract
- (For an extra flavor boost, use pure vanilla extract.)
- 1 cup chocolate chips
- (Try using dark chocolate or even white chocolate for variety.)
- ½ cup chopped nuts (optional)
- (Walnuts or pecans add a delightful crunch.)
Instructions
Step 1: Preheat Your Waffle Iron
Start by preheating your waffle iron according to the manufacturer’s instructions. A hot waffle iron is crucial for achieving that crispy texture.
Step 2: Mix Dry Ingredients
In a medium bowl, whisk together the flour, baking soda, and salt. This step ensures even distribution of the leavening agents, which is key to achieving the perfect rise and texture.
Step 3: Cream Butter and Sugars
In a large bowl, use an electric mixer to cream the softened butter, brown sugar, and granulated sugar until light and fluffy. This process incorporates air into the mixture, resulting in a lighter cookie.
Step 4: Add Eggs and Vanilla
Beat in the eggs one at a time, followed by the vanilla extract. Ensure everything is well combined, as this will impact the overall flavor of your cookies.
Step 5: Combine Wet and Dry Ingredients
Gradually add the dry mixture to the wet ingredients, mixing until just combined. Be careful not to overmix, as this can lead to tough cookies.
Step 6: Fold in Chocolate Chips and Nuts
Using a spatula, gently fold in the chocolate chips and nuts (if using). This step is where you can get creative—try adding different types of chocolate or even dried fruit!
Step 7: Cook in the Waffle Iron
Scoop about 2 tablespoons of dough for each cookie and place it in the preheated waffle iron. Close the lid and cook for about 5-7 minutes, or until the cookies are golden brown and crispy.
Step 8: Cool and Enjoy
Once cooked, carefully remove the cookies and let them cool on a wire rack. This cooling process will help them firm up even more, enhancing that crispy texture.