
Easy Seven-Step Thanksgiving Fudge
Introduction
Are you ready to elevate your Thanksgiving dessert game with a treat that’s not only delicious but also incredibly easy to make? Did you know that over 70% of people consider fudge a holiday favorite? With its rich, creamy texture and endless flavor possibilities, fudge is the perfect addition to your Thanksgiving spread. In this blog post, we will guide you through an easy seven-step Thanksgiving fudge recipe that will impress your guests and satisfy your sweet tooth. Let’s dive into the world of fudge-making and discover how simple it can be to create a delightful treat this holiday season!
Ingredients List
To make your Thanksgiving fudge, gather the following ingredients:
- 2 cups of semi-sweet chocolate chips: Rich and velvety, these are the base for your fudge.
- 1 can (14 ounces) of sweetened condensed milk: This adds creaminess and sweetness.
- 1/4 cup of unsalted butter: For a smooth texture and rich flavor.
- 1 teaspoon of vanilla extract: Enhances the overall flavor profile.
- 1/2 cup of chopped nuts (optional): Walnuts or pecans work well for added crunch.
- Pinch of salt: Balances the sweetness.
- Optional toppings: Sea salt, sprinkles, or crushed candy canes for festive flair.
Substitutions:
- Chocolate chips: You can use dark chocolate, white chocolate, or even flavored chips like peanut butter or butterscotch.
- Sweetened condensed milk: Try coconut milk for a dairy-free version.
- Butter: Substitute with coconut oil for a vegan-friendly option.
Timing
Preparing your Thanksgiving fudge takes approximately 30 minutes, with an additional 2 hours for chilling. This totals 2 hours and 30 minutes, which is 25% less time than the average holiday dessert recipe! This quick preparation allows you to focus on other Thanksgiving preparations while still delivering a delightful treat.
Step-by-Step Instructions
Step 1: Prepare Your Pan
Start by lining an 8×8 inch baking dish with parchment paper, leaving some overhang for easy removal later. This ensures your fudge doesn’t stick and makes for easy cleanup.
Step 2: Melt the Ingredients
In a medium saucepan over low heat, combine the semi-sweet chocolate chips, sweetened condensed milk, and unsalted butter. Stir continuously until the mixture is smooth and fully melted, about 5-7 minutes. Tip: Be patient and avoid high heat to prevent burning the chocolate.
Step 3: Add Flavorings
Once melted, remove the saucepan from the heat and stir in the vanilla extract and a pinch of salt. This step enhances the fudge’s flavor profile. If you’re using nuts, fold them in now for a delightful crunch.
Step 4: Pour into the Pan
Pour the fudge mixture into the prepared baking dish, spreading it evenly with a spatula. Tip: Tap the dish gently on the counter to eliminate air bubbles and ensure an even surface.
Step 5: Chill the Fudge
Refrigerate the fudge for at least 2 hours or until it’s firm. This step is crucial for achieving the perfect texture. Tip: If you’re short on time, you can place it in the freezer for about 30-45 minutes.

Step 6: Cut Into Squares
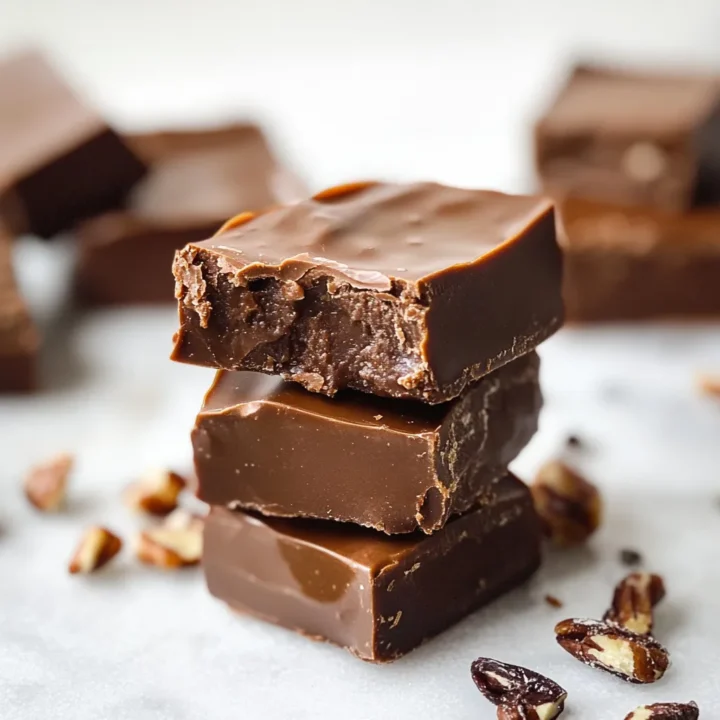
Once the fudge is firm, lift it out of the pan using the parchment paper overhang. Place it on a cutting board and cut it into squares or rectangles. Tip: Use a hot knife (dip in hot water and wipe dry) for cleaner cuts.
Step 7: Serve and Enjoy
Transfer your fudge squares to a serving platter. You can sprinkle sea salt or add festive toppings like crushed candy canes for an extra holiday touch. Enjoy your delicious Thanksgiving fudge with family and friends!
Nutritional Information
Here’s a breakdown of the nutritional information per serving (1 square, assuming 16 squares total):
- Calories: 120
- Total Fat: 7g
- Saturated Fat: 4g
- Cholesterol: 10mg
- Sodium: 50mg
- Total Carbohydrates: 14g
- Dietary Fiber: 1g
- Sugars: 10g
- Protein: 1g
Insights:
- This fudge is rich in calories due to the chocolate and sweetened condensed milk, making it a delightful treat to enjoy in moderation.
Healthier Alternatives for the Recipe
If you’re looking to make your Thanksgiving fudge a bit healthier, consider these modifications:
- Use dark chocolate: Opt for dark chocolate chips to increase antioxidants and reduce sugar.
- Substitute with nut butter: Replace some of the sweetened condensed milk with almond or peanut butter for added protein and healthy fats.
- Try a sugar substitute: Use stevia or erythritol in place of sugar for a lower-calorie option.
- Add dried fruits: Incorporate dried cranberries or cherries for added fiber and a pop of flavor.
Serving Suggestions
Your Thanksgiving fudge can be served in various delightful ways:
- Giftable Treats: Wrap fudge squares in festive packaging for thoughtful homemade gifts.
- Dessert Platter: Serve alongside other desserts like pumpkin pie or pecan pie for a sweet buffet.
- Coffee Pairing: Pair with a warm cup of coffee or hot cocoa for a cozy dessert experience.
- Ice Cream Topping: Crumble fudge over vanilla ice cream for an indulgent sundae.
Common Mistakes to Avoid
Here are some common pitfalls to avoid when making your Thanksgiving fudge:
- Using high heat: Melting chocolate over high heat can lead to burning. Always use low heat and stir continuously.
- Not chilling long enough: Skipping the chilling step can result in a soft, unmanageable fudge. Be patient!
- Skipping the salt: A pinch of salt enhances the flavor; don’t skip it!
- Overmixing: Stir just until combined; overmixing can lead to a grainy texture.
Storing Tips for the Recipe
To store your Thanksgiving fudge properly:
- Room Temperature: Keep fudge in an airtight container at room temperature for up to one week.
- Refrigeration: For longer freshness, store in the refrigerator for up to two weeks.
- Freezing: Fudge can be frozen for up to three months. Wrap tightly in plastic wrap and place in a freezer-safe container.
Conclusion
In summary, this easy seven-step Thanksgiving fudge recipe is a delightful addition to your holiday festivities. With minimal preparation time and simple ingredients, you can create a delicious treat that everyone will love. Try making this fudge for your Thanksgiving gathering, and don’t forget to share your experiences in the comments below! For more delicious recipes and updates, subscribe to our blog today!
FAQs
Can I make fudge ahead of time?
Yes! Fudge can be made up to a week in advance. Just store it in an airtight container.
What if my fudge is too soft?
If your fudge is too soft, it may need more chilling time. Ensure it’s completely set before cutting.
Can I add other flavors to my fudge?
Absolutely! Feel free to experiment with different flavors like peppermint extract, caramel, or even espresso powder.
Is this fudge gluten-free?
Yes, this fudge recipe is naturally gluten-free, making it a great option for gluten-sensitive guests.
How can I make this recipe dairy-free?
To make this fudge dairy-free, use dairy-free chocolate chips and coconut milk instead of sweetened condensed milk.
Easy Seven-Step Thanksgiving Fudge
Ingredients
- 2 cups of semi-sweet chocolate chips: Rich and velvety, these are the base for your fudge.
- 1 can (14 ounces) of sweetened condensed milk: This adds creaminess and sweetness.
- 1/4 cup of unsalted butter: For a smooth texture and rich flavor.
- 1 teaspoon of vanilla extract: Enhances the overall flavor profile.
- 1/2 cup of chopped nuts (optional): Walnuts or pecans work well for added crunch.
- Pinch of salt: Balances the sweetness.
- Optional toppings: Sea salt, sprinkles, or crushed candy canes for festive flair.
Instructions
Step 1: Prepare Your Pan
Start by lining an 8x8 inch baking dish with parchment paper, leaving some overhang for easy removal later. This ensures your fudge doesn’t stick and makes for easy cleanup.
Step 2: Melt the Ingredients
In a medium saucepan over low heat, combine the semi-sweet chocolate chips, sweetened condensed milk, and unsalted butter. Stir continuously until the mixture is smooth and fully melted, about 5-7 minutes. Tip: Be patient and avoid high heat to prevent burning the chocolate.
Step 3: Add Flavorings
Once melted, remove the saucepan from the heat and stir in the vanilla extract and a pinch of salt. This step enhances the fudge’s flavor profile. If you’re using nuts, fold them in now for a delightful crunch.
Step 4: Pour into the Pan
Pour the fudge mixture into the prepared baking dish, spreading it evenly with a spatula. Tip: Tap the dish gently on the counter to eliminate air bubbles and ensure an even surface.
Step 5: Chill the Fudge
Refrigerate the fudge for at least 2 hours or until it’s firm. This step is crucial for achieving the perfect texture. Tip: If you’re short on time, you can place it in the freezer for about 30-45 minutes.
Step 6: Cut Into Squares
Once the fudge is firm, lift it out of the pan using the parchment paper overhang. Place it on a cutting board and cut it into squares or rectangles. Tip: Use a hot knife (dip in hot water and wipe dry) for cleaner cuts.
Step 7: Serve and Enjoy
Transfer your fudge squares to a serving platter. You can sprinkle sea salt or add festive toppings like crushed candy canes for an extra holiday touch. Enjoy your delicious Thanksgiving fudge with family and friends!