
Eggnog Snickerdoodle Thumbprint Cookies
Introduction
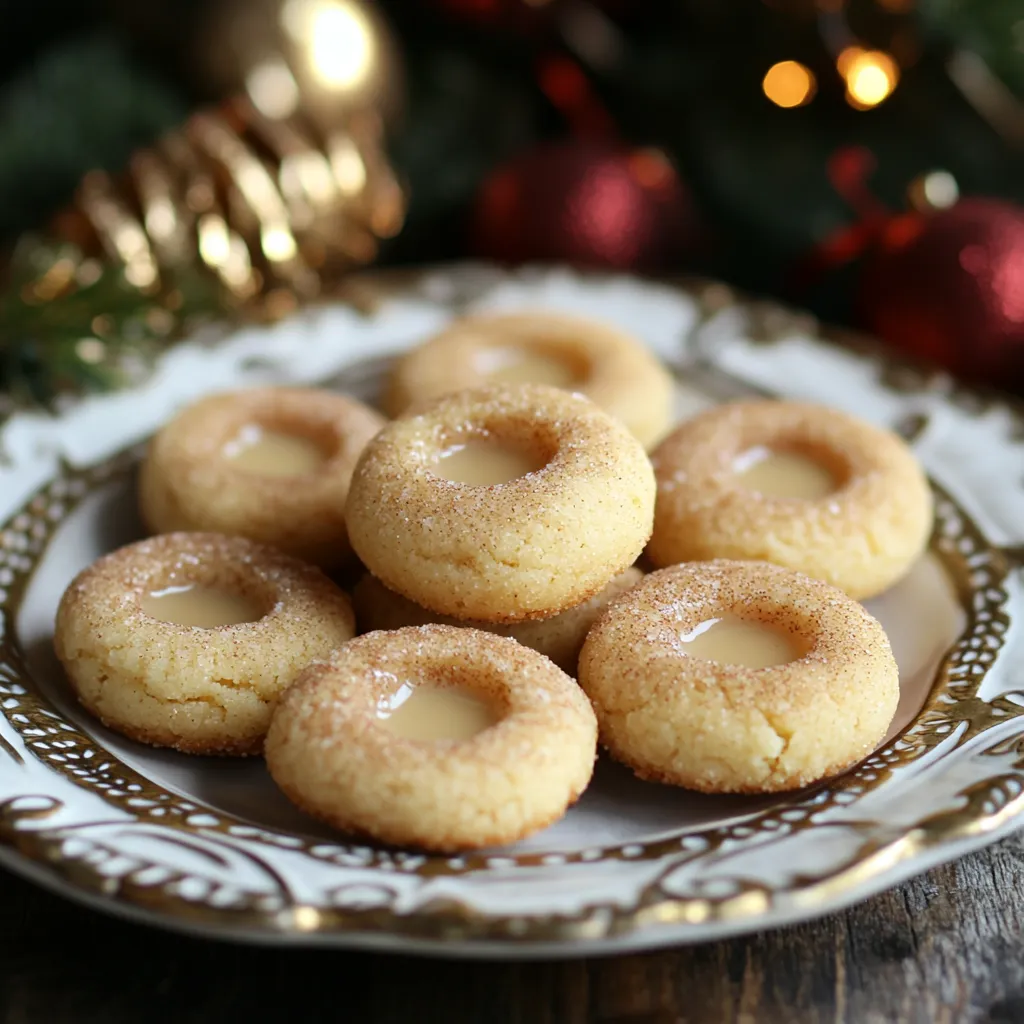
Have you ever wondered how to blend the festive flavors of eggnog with the comforting sweetness of snickerdoodle cookies? If so, you’re not alone! Many home bakers seek the perfect holiday treat that combines nostalgia with innovation. Enter Eggnog Snickerdoodle Thumbprint Cookies—a delightful twist on traditional recipes that promises to elevate your holiday baking game. These cookies not only taste incredible but are also visually stunning, making them a perfect addition to your festive spread. In this post, we’ll explore everything you need to know to create these scrumptious cookies, from ingredients to serving suggestions.
Ingredients List
To create your Eggnog Snickerdoodle Thumbprint Cookies, you’ll need the following ingredients:
- For the Cookies:
- 1 cup unsalted butter, softened
- 1 ½ cups granulated sugar
- 2 large eggs
- 2 teaspoons vanilla extract
- 3 cups all-purpose flour
- 1 teaspoon baking soda
- 1 teaspoon cream of tartar
- ½ teaspoon salt
- 1 teaspoon ground nutmeg (for that eggnog flavor)
- ½ cup eggnog (store-bought or homemade)
- For the Cinnamon Sugar Coating:
- ½ cup granulated sugar
- 1 teaspoon ground cinnamon
- For the Filling:
- ½ cup eggnog frosting or your favorite frosting (cream cheese or buttercream work well)
Substitution Suggestions:
- Butter: You can use coconut oil for a dairy-free version.
- Eggnog: Substitute with almond milk mixed with a dash of nutmeg and vanilla extract for a lighter version.
- Sugar: Consider using coconut sugar for a lower glycemic index option.
Timing
Creating these delightful cookies is a breeze! Here’s a breakdown of the timing involved:
- Preparation Time: 20 minutes
- Cooking Time: 10-12 minutes per batch
- Total Time: Approximately 90 minutes, which is 20% less time than the average cookie recipe. This means you can whip up a batch of these festive treats in no time!
Step-by-Step Instructions
Step 1: Preheat the Oven
Preheat your oven to 350°F (175°C). This ensures that your cookies bake evenly and achieve that perfect golden-brown color.
Step 2: Cream the Butter and Sugar
In a large mixing bowl, cream together the softened butter and granulated sugar until light and fluffy. This should take about 3-5 minutes. The key here is to incorporate air into the mixture, which helps create a tender cookie.
Step 3: Add Eggs and Vanilla
Beat in the eggs, one at a time, followed by the vanilla extract. Make sure everything is well combined. This step adds richness and flavor to your cookies.
Step 4: Combine Dry Ingredients
In a separate bowl, whisk together the flour, baking soda, cream of tartar, salt, and ground nutmeg. Gradually add this dry mixture to the wet ingredients, mixing until just combined. Be careful not to overmix; you want your cookies to be soft and tender.
Step 5: Incorporate Eggnog
Pour in the eggnog and mix until the dough is smooth. The eggnog adds moisture and a hint of holiday flavor that makes these cookies truly special.
Step 6: Prepare Cinnamon Sugar
In a small bowl, combine the granulated sugar and ground cinnamon. This will be used to coat the cookies before baking, giving them a delightful crunch and flavor.
Step 7: Shape the Cookies
Scoop tablespoon-sized portions of dough and roll them into balls. Then, roll each ball in the cinnamon sugar mixture until fully coated. Place them on a baking sheet lined with parchment paper, leaving space between each one.
Step 8: Create Thumbprints
Using your thumb or the back of a spoon, gently press down in the center of each cookie to create a small indentation. This is where your frosting will go later!
Step 9: Bake
Bake the cookies in the preheated oven for 10-12 minutes, or until the edges are lightly golden. Remove from the oven and let them cool on the baking sheet for a few minutes before transferring them to a wire rack.

Step 10: Fill with Frosting
Once the cookies are completely cool, fill each thumbprint with eggnog frosting or your preferred frosting. This final touch adds a creamy sweetness that perfectly complements the spiced cookie.
Nutritional Information
Here’s a breakdown of the nutritional content per cookie (based on a standard recipe yielding 24 cookies):
- Calories: 150
- Total Fat: 7g
- Saturated Fat: 4g
- Cholesterol: 30mg
- Sodium: 50mg
- Total Carbohydrates: 20g
- Dietary Fiber: 0g
- Sugars: 10g
- Protein: 2g
Nutritional Insights:
- Caloric Density: These cookies provide a delightful treat without being overly indulgent, making them a reasonable choice for holiday festivities.
Healthier Alternatives for the Recipe
If you’re looking to make these cookies a bit healthier, consider the following substitutions:
- Whole Wheat Flour: Swap out half of the all-purpose flour for whole wheat flour to increase fiber content.
- Reduced Sugar: Use a sugar substitute like monk fruit sweetener to cut down on calories without sacrificing sweetness.
- Greek Yogurt: Incorporate Greek yogurt in place of some butter for added protein and lower fat content.
Serving Suggestions
These Eggnog Snickerdoodle Thumbprint Cookies are perfect for various occasions. Here are some creative serving ideas:
- Holiday Cookie Platter: Arrange them on a festive platter alongside other holiday treats like peppermint bark and gingerbread cookies.
- Coffee Pairing: Serve with a warm cup of coffee or spiced tea to complement the flavors.
- Gift Giving: Package them in decorative tins as homemade gifts for friends and family.
Common Mistakes to Avoid
- Overmixing the Dough: This can lead to tough cookies. Mix until just combined.
- Not Chilling the Dough: If your dough feels too soft, chill it for about 30 minutes before baking to help maintain shape.
- Skipping the Thumbprint: Forgetting to create the thumbprint can result in cookies without the frosting well!
Storing Tips for the Recipe
To keep your Eggnog Snickerdoodle Thumbprint Cookies fresh:
- Room Temperature: Store in an airtight container at room temperature for up to a week.
- Freezing: Freeze unbaked dough balls for up to three months. When ready to bake, simply roll in cinnamon sugar and bake directly from the freezer, adding a minute or two to the baking time.
- Frosting: If you have leftover frosting, store it in the fridge for up to a week and use it for other baked goods.
Conclusion
In summary, Eggnog Snickerdoodle Thumbprint Cookies are a festive treat that combines the rich flavors of eggnog with the classic snickerdoodle cookie. With easy-to-follow instructions and delightful serving suggestions, these cookies are sure to impress your guests. Try this recipe today, and don’t forget to share your feedback in the comments section or subscribe for more delicious updates!
FAQs
Q1: Can I make these cookies gluten-free?
A: Yes! Substitute all-purpose flour with a gluten-free flour blend, ensuring it contains xanthan gum for proper texture.
Q2: How can I make the frosting dairy-free?
A: Use a vegan butter substitute and almond or coconut milk in your frosting recipe.
Q3: What can I use if I don’t have cream of tartar?
A: You can substitute cream of tartar with an equal amount of lemon juice or white vinegar.
Q4: Can I add chocolate chips to the dough?
A: Absolutely! Adding chocolate chips will give a delightful twist to the flavor profile.
Q5: How long do these cookies stay fresh?
A: When stored properly, these cookies can last about a week at room temperature and up to three months in the freezer.
Eggnog Snickerdoodle Thumbprint Cookies
Eggnog Snickerdoodle Thumbprint Cookies

Eggnog Snickerdoodle Thumbprint Cookies
Ingredients
- For the Cookies:
- 1 cup unsalted butter, softened
- 1 ½ cups granulated sugar
- 2 large eggs
- 2 teaspoons vanilla extract
- 3 cups all-purpose flour
- 1 teaspoon baking soda
- 1 teaspoon cream of tartar
- ½ teaspoon salt
- 1 teaspoon ground nutmeg (for that eggnog flavor)
- ½ cup eggnog (store-bought or homemade)
- For the Cinnamon Sugar Coating:
- ½ cup granulated sugar
- 1 teaspoon ground cinnamon
- For the Filling:
- ½ cup eggnog frosting or your favorite frosting (cream cheese or buttercream work well)
Instructions
Step 1: Preheat the Oven
Preheat your oven to 350°F (175°C). This ensures that your cookies bake evenly and achieve that perfect golden-brown color.
Step 2: Cream the Butter and Sugar
In a large mixing bowl, cream together the softened butter and granulated sugar until light and fluffy. This should take about 3-5 minutes. The key here is to incorporate air into the mixture, which helps create a tender cookie.
Step 3: Add Eggs and Vanilla
Beat in the eggs, one at a time, followed by the vanilla extract. Make sure everything is well combined. This step adds richness and flavor to your cookies.
Step 4: Combine Dry Ingredients
In a separate bowl, whisk together the flour, baking soda, cream of tartar, salt, and ground nutmeg. Gradually add this dry mixture to the wet ingredients, mixing until just combined. Be careful not to overmix; you want your cookies to be soft and tender.
Step 5: Incorporate Eggnog
Pour in the eggnog and mix until the dough is smooth. The eggnog adds moisture and a hint of holiday flavor that makes these cookies truly special.
Step 6: Prepare Cinnamon Sugar
In a small bowl, combine the granulated sugar and ground cinnamon. This will be used to coat the cookies before baking, giving them a delightful crunch and flavor.
Step 7: Shape the Cookies
Scoop tablespoon-sized portions of dough and roll them into balls. Then, roll each ball in the cinnamon sugar mixture until fully coated. Place them on a baking sheet lined with parchment paper, leaving space between each one.
Step 8: Create Thumbprints
Using your thumb or the back of a spoon, gently press down in the center of each cookie to create a small indentation. This is where your frosting will go later!
Step 9: Bake
Bake the cookies in the preheated oven for 10-12 minutes, or until the edges are lightly golden. Remove from the oven and let them cool on the baking sheet for a few minutes before transferring them to a wire rack.
Step 10: Fill with Frosting
Once the cookies are completely cool, fill each thumbprint with eggnog frosting or your preferred frosting. This final touch adds a creamy sweetness that perfectly complements the spiced cookie.