
Frozen Yogurt Peanut Butter Bites
Introduction
Are you looking for a delicious and healthy snack that satisfies your sweet tooth without the guilt? Imagine indulging in creamy frozen yogurt combined with the rich, nutty flavor of peanut butter. These Frozen Yogurt Peanut Butter Bites are not only easy to make but also provide a perfect balance of taste and nutrition. Did you know that incorporating yogurt into your diet can enhance gut health and boost protein intake? In this post, we will explore how to create these delightful bites that are perfect for any occasion.
Ingredients List
To make your Frozen Yogurt Peanut Butter Bites, you’ll need the following ingredients:
- 1 cup Greek yogurt (plain or flavored)
- 1/2 cup natural peanut butter (or almond butter for a nut-free option)
- 2 tablespoons honey or maple syrup (for sweetness)
- 1 teaspoon vanilla extract (for added flavor)
- Pinch of salt (to enhance flavors)
- Optional toppings: crushed nuts, chocolate chips, or granola
Substitutions
- Greek Yogurt: You can use regular yogurt or dairy-free yogurt alternatives like coconut or almond yogurt.
- Peanut Butter: Substitute with sunflower seed butter for a nut-free option.
- Sweetener: Agave syrup or stevia can be used as alternatives to honey or maple syrup.
Timing
Preparing these Frozen Yogurt Peanut Butter Bites is quick and easy! Here’s the breakdown:
- Preparation Time: 10 minutes
- Freezing Time: 1 hour
- Total Time: 1 hour 10 minutes
This total time is approximately 20% less than many traditional dessert recipes, making it a perfect choice for a quick treat!
Step-by-Step Instructions
Step 1: Prepare the Mixture
In a mixing bowl, combine the Greek yogurt, peanut butter, honey (or maple syrup), vanilla extract, and a pinch of salt. Use a whisk or spatula to blend until smooth and creamy.
Tip: For a fluffier texture, consider using an electric mixer for about 2 minutes.
Step 2: Portion the Mixture
Using a tablespoon or a small cookie scoop, portion out the yogurt mixture onto a baking sheet lined with parchment paper. Aim for bite-sized dollops.
Tip: To create uniform bites, use an ice cream scoop for perfect round shapes.
Step 3: Add Toppings
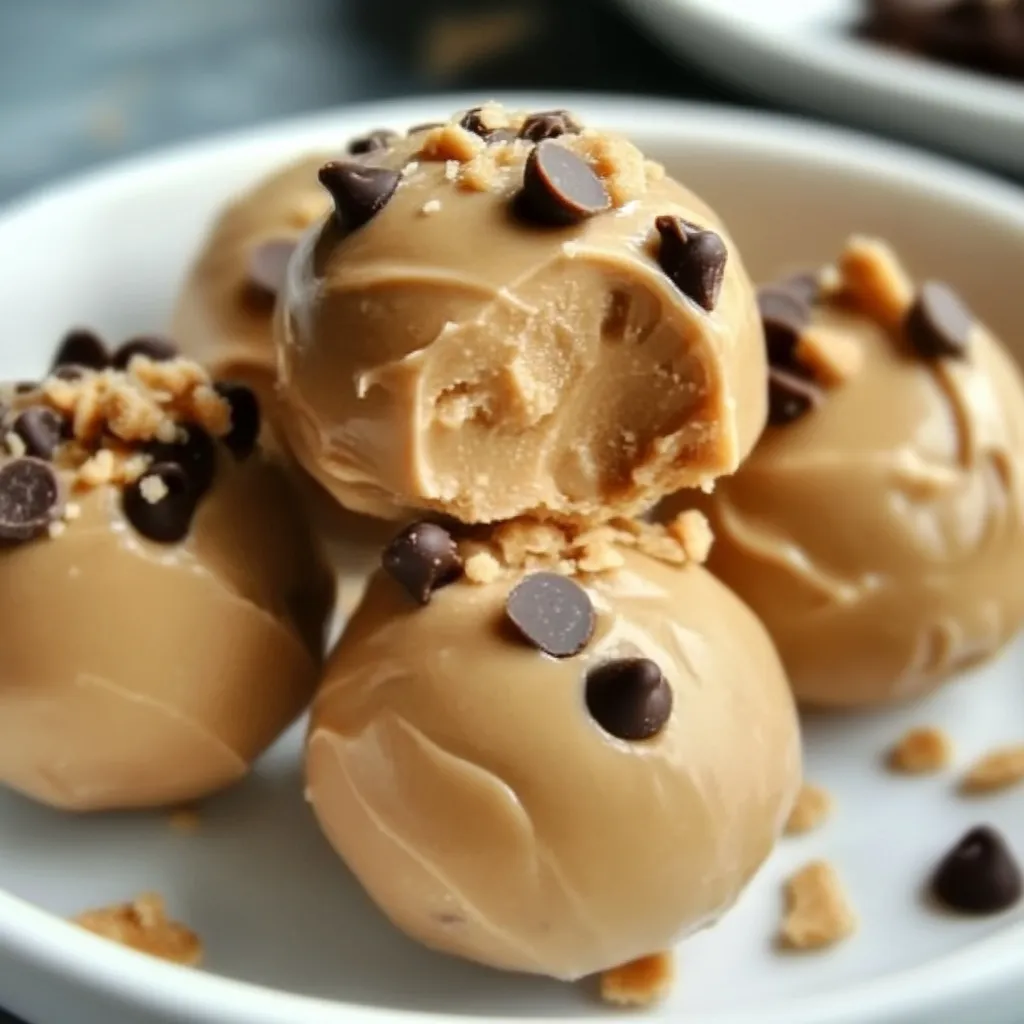
Sprinkle your choice of toppings such as crushed nuts, chocolate chips, or granola on top of each dollop. This adds a delightful crunch and enhances the flavor.
Tip: Customize the toppings based on your preference or dietary needs!
Step 4: Freeze
Place the baking sheet in the freezer for at least 1 hour or until the bites are solid.
Tip: If you’re in a hurry, you can freeze them for 30 minutes, but longer freezing will yield better results.
Step 5: Enjoy!
Once frozen, remove the bites from the baking sheet and store them in an airtight container in the freezer. Enjoy them straight from the freezer for a refreshing snack!
Tip: Allow them to sit at room temperature for a few minutes for a softer texture before eating.
Nutritional Information
Here’s a breakdown of the nutritional information per serving (approximately 3 bites):
- Calories: 150
- Protein: 6g
- Fat: 10g
- Carbohydrates: 12g
- Fiber: 1g
- Sugar: 5g
Nutritional Insights
- High in Protein: Greek yogurt is an excellent source of protein, essential for muscle repair and growth.
- Healthy Fats: Peanut butter provides healthy monounsaturated fats that are beneficial for heart health.
Healthier Alternatives for the Recipe
If you’re looking to make your Frozen Yogurt Peanut Butter Bites even healthier, consider these alternatives:
- Use Low-Fat Yogurt: Opt for low-fat or fat-free yogurt to reduce calories.
- Sweetener Alternatives: Use mashed bananas or unsweetened applesauce instead of honey or syrup for natural sweetness.
- Add Superfoods: Incorporate chia seeds or flaxseeds into the mixture for added fiber and omega-3 fatty acids.
Serving Suggestions
These Frozen Yogurt Peanut Butter Bites can be enjoyed in various ways:
- As a Snack: Perfect for a quick afternoon pick-me-up or a post-workout treat.
- In Smoothie Bowls: Blend them into your smoothie bowls for added creaminess and flavor.
- With Fresh Fruit: Serve alongside fresh fruit like strawberries or bananas for a colorful and nutritious platter.
Common Mistakes to Avoid
To ensure your Frozen Yogurt Peanut Butter Bites turn out perfectly, avoid these common pitfalls:
- Not Mixing Thoroughly: Ensure the peanut butter and yogurt are well combined for a smooth texture.
- Overcrowding the Baking Sheet: Leave enough space between each dollop to allow for even freezing.
- Skipping the Freezing Step: Don’t skip freezing; this is crucial for achieving the right texture.
Storing Tips for the Recipe
To keep your Frozen Yogurt Peanut Butter Bites fresh:
- Airtight Container: Store them in an airtight container in the freezer to prevent freezer burn.
- Label and Date: If you make a large batch, label the container with the date to keep track of freshness.
- Pre-portioning: Consider pre-portioning them into snack bags for easy grab-and-go options.
Conclusion
In summary, Frozen Yogurt Peanut Butter Bites are a delightful and healthy treat that you can whip up in no time. With their creamy texture and rich flavor, they are sure to become a favorite in your household. Try this recipe today, and don’t forget to share your feedback in the comments section or subscribe for more delicious updates!
FAQs
Q1: Can I use other nut butters?
A1: Absolutely! Almond butter, cashew butter, or sunflower seed butter are great alternatives.
Q2: How long do these bites last in the freezer?
A2: They can last up to 2 months in the freezer if stored properly in an airtight container.
Q3: Are these bites suitable for kids?
A3: Yes! They make a great snack for kids and can be customized to suit their tastes.
Q4: Can I add protein powder to the mixture?
A4: Yes, adding protein powder can enhance the protein content. Just adjust the liquid ingredients accordingly.
Q5: How can I make these bites vegan?
A5: Use dairy-free yogurt and maple syrup instead of honey to make them completely vegan.

Frozen Yogurt Peanut Butter Bites
Ingredients
- 1 cup Greek yogurt (plain or flavored)
- 1/2 cup natural peanut butter (or almond butter for a nut-free option)
- 2 tablespoons honey or maple syrup (for sweetness)
- 1 teaspoon vanilla extract (for added flavor)
- Pinch of salt (to enhance flavors)
- Optional toppings: crushed nuts, chocolate chips, or granola
- Substitutions
- Greek Yogurt: You can use regular yogurt or dairy-free yogurt alternatives like coconut or almond yogurt.
- Peanut Butter: Substitute with sunflower seed butter for a nut-free option.
- Sweetener: Agave syrup or stevia can be used as alternatives to honey or maple syrup.
Instructions
Step 1: Prepare the Mixture
In a mixing bowl, combine the Greek yogurt, peanut butter, honey (or maple syrup), vanilla extract, and a pinch of salt. Use a whisk or spatula to blend until smooth and creamy.
Tip: For a fluffier texture, consider using an electric mixer for about 2 minutes.
Step 2: Portion the Mixture
Using a tablespoon or a small cookie scoop, portion out the yogurt mixture onto a baking sheet lined with parchment paper. Aim for bite-sized dollops.
Tip: To create uniform bites, use an ice cream scoop for perfect round shapes.
Step 3: Add Toppings
Sprinkle your choice of toppings such as crushed nuts, chocolate chips, or granola on top of each dollop. This adds a delightful crunch and enhances the flavor.
Tip: Customize the toppings based on your preference or dietary needs!
Step 4: Freeze
Place the baking sheet in the freezer for at least 1 hour or until the bites are solid.
Tip: If you're in a hurry, you can freeze them for 30 minutes, but longer freezing will yield better results.
Step 5: Enjoy!
Once frozen, remove the bites from the baking sheet and store them in an airtight container in the freezer. Enjoy them straight from the freezer for a refreshing snack!
Tip: Allow them to sit at room temperature for a few minutes for a softer texture before eating.