
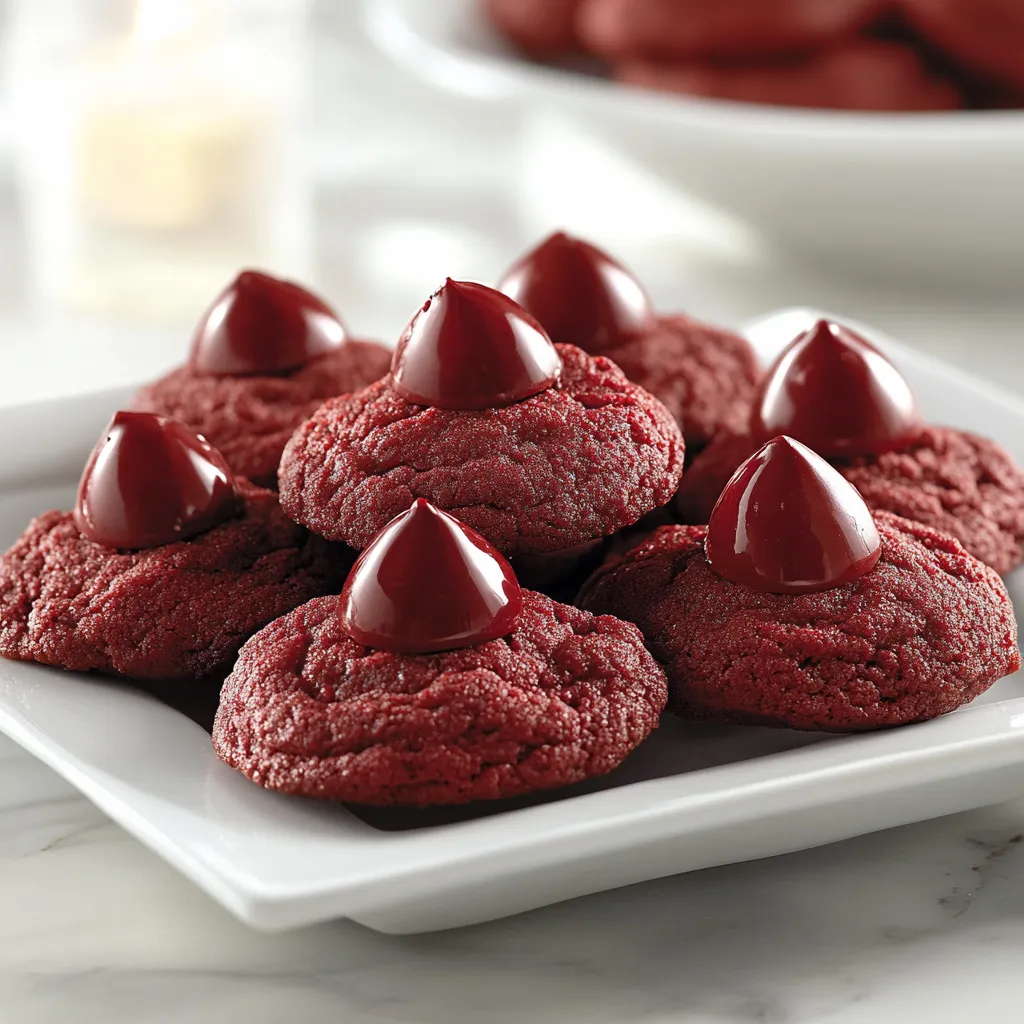
Hershey’s Red Velvet Blossom Cookies: A Delightful Treat for Every Occasion
Introduction
Have you ever wondered how a simple cookie can evoke such joy and nostalgia? The secret lies in the perfect blend of flavors and textures. Hershey’s Red Velvet Blossom Cookies are not just a treat; they are an experience that combines the rich flavor of red velvet with the delightful surprise of a Hershey’s Kiss on top. In this post, we’ll explore how to make these cookies, the science behind their irresistible taste, and tips to ensure your baking adventure is a success. Let’s dive into the world of Hershey’s Red Velvet Blossom Cookies!
Ingredients List
To create the perfect batch of Hershey’s Red Velvet Blossom Cookies, you’ll need the following ingredients:
Basic Ingredients:
- 2 1/4 cups all-purpose flour: Provides structure to the cookies.
- 1/2 cup unsweetened cocoa powder: Adds depth and richness.
- 1 teaspoon baking soda: Helps the cookies rise.
- 1/2 teaspoon salt: Enhances flavor.
- 1 cup unsalted butter, softened: Ensures a rich, tender texture.
- 1 cup granulated sugar: Sweetens the cookies perfectly.
- 1/2 cup brown sugar: Adds moisture and a hint of caramel flavor.
- 1 large egg: Binds the ingredients together.
- 1 tablespoon red food coloring: Gives the cookies their signature color.
- 1 teaspoon vanilla extract: Enhances the overall flavor.
Topping:
- Hershey’s Kisses: The iconic chocolate that tops each cookie.
Substitutions:
- Gluten-Free Flour: Use a gluten-free all-purpose blend for a gluten-free version.
- Coconut Sugar: Substitute for a healthier sweetener option.
- Vegan Butter: Swap out the unsalted butter for a plant-based alternative to make vegan cookies.
Timing
Creating these delightful cookies is a breeze! Here’s a breakdown of the time involved:
- Preparation Time: 20 minutes
- Cooking Time: 10-12 minutes
- Total Time: Approximately 30 minutes
This is about 20% less time than the average cookie recipe, making it a quick and satisfying baking project!
Step-by-Step Instructions
Step 1: Preheat the Oven
Preheat your oven to 350°F (175°C). This ensures that your cookies bake evenly and achieve that perfect texture.
Step 2: Prepare Dry Ingredients
In a medium bowl, whisk together 2 1/4 cups of all-purpose flour, 1/2 cup of unsweetened cocoa powder, 1 teaspoon of baking soda, and 1/2 teaspoon of salt. This step combines the dry ingredients and helps distribute the leavening agent evenly.
Step 3: Cream Butter and Sugars
In a large mixing bowl, beat together 1 cup of softened unsalted butter, 1 cup of granulated sugar, and 1/2 cup of brown sugar until the mixture is light and fluffy. This should take about 3-5 minutes. The fluffy texture is crucial for achieving the perfect cookie consistency.
Step 4: Add Egg and Flavorings
Add 1 large egg, 1 tablespoon of red food coloring, and 1 teaspoon of vanilla extract to the creamed butter and sugars. Mix until well combined.
Step 5: Combine Wet and Dry Ingredients
Gradually add the dry ingredient mixture into the wet mixture, stirring until just combined. Be careful not to overmix, as this can lead to tough cookies.
Step 6: Shape the Cookies
Using a cookie scoop or your hands, form the dough into 1-inch balls. Place them on a baking sheet lined with parchment paper, leaving about 2 inches between each cookie.
Step 7: Bake the Cookies
Bake in the preheated oven for 10-12 minutes or until the edges are set. The centers may look slightly underbaked, which is perfect for a chewy texture.
Step 8: Add the Hershey’s Kisses
As soon as you remove the cookies from the oven, gently press a Hershey’s Kiss into the center of each cookie. Allow them to cool on the baking sheet for 5 minutes before transferring them to a wire rack to cool completely.
Nutritional Information
Understanding the nutritional content of your treats can help you enjoy them responsibly. Here’s a breakdown per cookie (based on a recipe yielding 24 cookies):
- Calories: 120
- Total Fat: 6g
- Saturated Fat: 3.5g
- Cholesterol: 15mg
- Sodium: 60mg
- Total Carbohydrates: 16g
- Dietary Fiber: 0.5g
- Sugars: 8g
- Protein: 1g
These cookies are a delightful indulgence, so enjoy them in moderation!
Healthier Alternatives for the Recipe
If you’re looking to make your Hershey’s Red Velvet Blossom Cookies a bit healthier, consider the following alternatives:
- Whole Wheat Flour: Swap half of the all-purpose flour for whole wheat flour to increase fiber content.
- Applesauce: Replace half of the butter with unsweetened applesauce for a lower-fat option.
- Dark Chocolate Kisses: Use dark chocolate Hershey’s Kisses for a richer flavor and added antioxidants.
Serving Suggestions
To elevate your cookie experience, try these serving suggestions:
- With a Glass of Milk: The classic pairing that never goes out of style.
- Ice Cream Sandwiches: Place a scoop of vanilla or cream cheese ice cream between two cookies for a decadent treat.
- Decorative Platter: Arrange cookies on a decorative platter with fresh berries and mint leaves for a visually appealing presentation.
Common Mistakes to Avoid
Baking can be tricky, but avoiding these common mistakes can ensure your cookies turn out perfectly:
- Overmixing the Dough: This can lead to tough cookies. Mix until just combined.
- Incorrect Oven Temperature: Always preheat your oven for even baking. An oven thermometer can help ensure accuracy.
- Not Cooling the Cookies: Allowing cookies to cool on the baking sheet before transferring them helps maintain their shape.
Storing Tips for the Recipe
To keep your Hershey’s Red Velvet Blossom Cookies fresh:
- Room Temperature: Store cookies in an airtight container at room temperature for up to one week.
- Freezing: Freeze cookies in a single layer on a baking sheet, then transfer to a freezer bag for up to three months. Thaw and enjoy whenever you crave a sweet treat!
Conclusion
Hershey’s Red Velvet Blossom Cookies are a delightful blend of flavors and textures that are sure to impress. With simple ingredients and easy steps, you can create a batch that’s perfect for any occasion. Try this recipe today, and don’t forget to share your feedback in the comments below or subscribe for more delicious updates!
FAQs
Q1: Can I make these cookies ahead of time?
A1: Yes! You can prepare the dough ahead of time and refrigerate it for up to 3 days. Just roll and bake when you’re ready.
Q2: What if I don’t have red food coloring?
A2: You can omit it for a chocolate cookie variation, or use beet juice for a natural alternative.
Q3: How can I make these cookies less sweet?
A3: Reduce the amount of sugar by 1/4 cup, and consider using dark chocolate Kisses for a less sweet topping.
Q4: Can I use different toppings?
A4: Absolutely! Feel free to experiment with white chocolate chips or caramel candies for a unique twist.
Q5: What’s the best way to soften butter quickly?
A5: Cut the butter into small cubes and let it sit at room temperature for about 15 minutes, or microwave it on low power in short bursts.

Hershey’s Red Velvet Blossom Cookies: A Delightful Treat for Every Occasion
Ingredients
- 2 1/4 cups all-purpose flour: Provides structure to the cookies.
- 1/2 cup unsweetened cocoa powder: Adds depth and richness.
- 1 teaspoon baking soda: Helps the cookies rise.
- 1/2 teaspoon salt: Enhances flavor.
- 1 cup unsalted butter, softened: Ensures a rich, tender texture.
- 1 cup granulated sugar: Sweetens the cookies perfectly.
- 1/2 cup brown sugar: Adds moisture and a hint of caramel flavor.
- 1 large egg: Binds the ingredients together.
- 1 tablespoon red food coloring: Gives the cookies their signature color.
- 1 teaspoon vanilla extract: Enhances the overall flavor.
- Topping:
- Hershey’s Kisses: The iconic chocolate that tops each cookie.
- Substitutions:
- Gluten-Free Flour: Use a gluten-free all-purpose blend for a gluten-free version.
- Coconut Sugar: Substitute for a healthier sweetener option.
- Vegan Butter: Swap out the unsalted butter for a plant-based alternative to make vegan cookies.
Instructions
Step 1: Preheat the Oven
Preheat your oven to 350°F (175°C). This ensures that your cookies bake evenly and achieve that perfect texture.
Step 2: Prepare Dry Ingredients
In a medium bowl, whisk together 2 1/4 cups of all-purpose flour, 1/2 cup of unsweetened cocoa powder, 1 teaspoon of baking soda, and 1/2 teaspoon of salt. This step combines the dry ingredients and helps distribute the leavening agent evenly.
Step 3: Cream Butter and Sugars
In a large mixing bowl, beat together 1 cup of softened unsalted butter, 1 cup of granulated sugar, and 1/2 cup of brown sugar until the mixture is light and fluffy. This should take about 3-5 minutes. The fluffy texture is crucial for achieving the perfect cookie consistency.
Step 4: Add Egg and Flavorings
Add 1 large egg, 1 tablespoon of red food coloring, and 1 teaspoon of vanilla extract to the creamed butter and sugars. Mix until well combined.
Step 5: Combine Wet and Dry Ingredients
Gradually add the dry ingredient mixture into the wet mixture, stirring until just combined. Be careful not to overmix, as this can lead to tough cookies.
Step 6: Shape the Cookies
Using a cookie scoop or your hands, form the dough into 1-inch balls. Place them on a baking sheet lined with parchment paper, leaving about 2 inches between each cookie.
Step 7: Bake the Cookies
Bake in the preheated oven for 10-12 minutes or until the edges are set. The centers may look slightly underbaked, which is perfect for a chewy texture.
Step 8: Add the Hershey’s Kisses
As soon as you remove the cookies from the oven, gently press a Hershey’s Kiss into the center of each cookie. Allow them to cool on the baking sheet for 5 minutes before transferring them to a wire rack to cool completely.