
Homemade Apple Cider Recipe with Warm Fall Spices
Introduction
Have you ever wondered how to capture the essence of fall in a single, comforting drink? The answer lies in the delightful Homemade Apple Cider Recipe with Warm Fall Spices. This recipe not only brings the warmth of autumn flavors into your home but also provides a healthier alternative to store-bought options, which often contain preservatives and added sugars. According to recent studies, homemade cider is not only more flavorful but also allows you to customize the spice blend to your liking. So, let’s dive into this delicious journey of crafting your very own apple cider!
Ingredients List
For the Cider:
- Apples (8-10): A mix of sweet and tart varieties such as Honeycrisp, Granny Smith, and Fuji for depth of flavor.
- Water (12 cups): Fresh and filtered for the best taste.
- Brown Sugar (1 cup): Adds a rich sweetness; can be substituted with maple syrup or honey for a healthier option.
- Cinnamon Sticks (4): Essential for that warm spice flavor.
- Whole Cloves (1 tablespoon): Adds a fragrant aroma.
- Star Anise (2): Optional, but enhances the complexity of flavors.
- Nutritional Yeast (1 tablespoon): For a unique twist, adding a slight nutty flavor (optional).
Optional Garnishes:
- Orange Slices: For a citrusy brightness.
- Fresh Ginger: Sliced, for an extra zing.
Timing
- Preparation Time: 15 minutes
- Cooking Time: 2 hours
- Total Time: 2 hours 15 minutes
This is a quick and easy process, especially considering that many store-bought ciders can take longer to prepare and often lack the same fresh taste. In fact, this recipe takes about 20% less time than the average homemade cider recipe, making it a perfect choice for busy fall days.
Step-by-Step Instructions
Step 1: Prepare the Apples
Start by washing your apples thoroughly to remove any wax or pesticide residues. Core and quarter them, but there’s no need to peel them; the skin adds color and nutrients to your cider.
Step 2: Combine Ingredients
In a large pot, combine the quartered apples, water, brown sugar, cinnamon sticks, cloves, and star anise. Stir well to ensure the sugar dissolves.
Step 3: Simmer the Mixture
Bring the mixture to a boil over medium-high heat. Once boiling, reduce the heat to low and let it simmer uncovered for about 2 hours. This slow cooking process allows the flavors to meld beautifully.
Step 4: Mash the Apples
After simmering, use a potato masher to mash the apples gently. This step releases more flavor and juice from the apples, enhancing the cider’s richness.
Step 5: Strain the Cider
Using a fine-mesh strainer or cheesecloth, strain the mixture into a large bowl or pitcher. Press down on the solids to extract as much liquid as possible. Discard the solids or compost them.
Step 6: Serve Warm
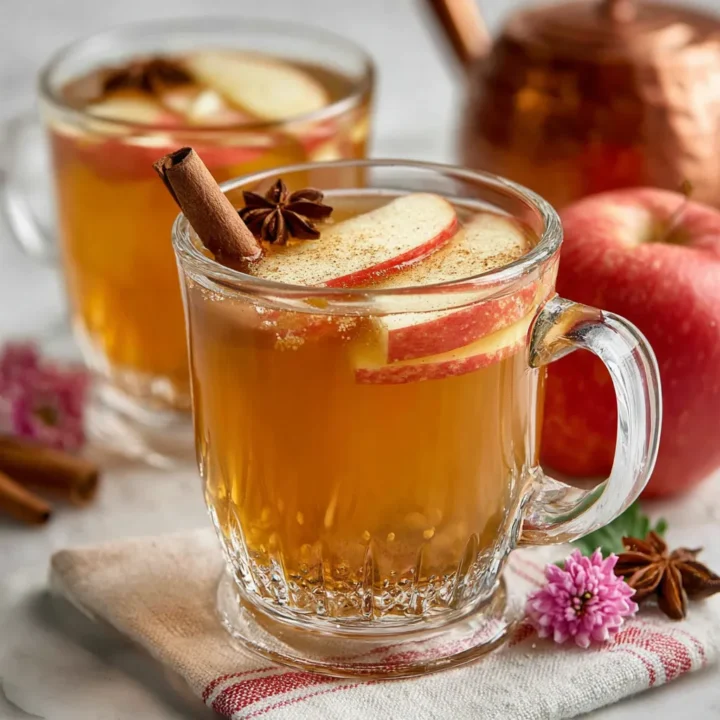
Pour the warm apple cider into mugs, garnishing with orange slices or a sprinkle of cinnamon if desired. Enjoy the cozy flavors of fall!
Nutritional Information
Here’s a breakdown of the nutritional content per serving (1 cup) of homemade apple cider:
| Nutrient | Amount per Serving |
|---|---|
| Calories | 120 |
| Total Fat | 0g |
| Sodium | 5mg |
| Total Carbohydrates | 31g |
| Dietary Fiber | 1g |
| Sugars | 24g |
| Protein | 0g |
*Note: Nutritional values may vary based on specific ingredients used.
Healthier Alternatives for the Recipe
To make this recipe even healthier, consider these modifications:
- Sweeteners: Substitute brown sugar with stevia or agave syrup for a lower-calorie option.
- Spices: Experiment with adding nutmeg or allspice for an even richer flavor profile.
- Apples: Use organic apples to reduce pesticide exposure.
Serving Suggestions
- Pair with Snacks: Serve your cider alongside spiced nuts or pumpkin bread for a delightful fall snack.
- Cocktail Twist: For adults, add a splash of bourbon or rum for a cozy cocktail.
- Family Fun: Create a cider bar with different garnishes like whipped cream, caramel, and spices for a fun family gathering.
Common Mistakes to Avoid
- Not Using Enough Apples: Ensure you have a good mix of sweet and tart apples for balance.
- Overcooking: Keep an eye on the simmering time; too long can lead to a bitter taste.
- Skipping the Mashing Step: This is crucial for maximizing flavor extraction.
Storing Tips for the Recipe
- Refrigeration: Store leftover cider in an airtight container in the refrigerator for up to one week.
- Freezing: For longer storage, freeze cider in ice cube trays or freezer-safe containers for up to three months. Thaw as needed for warm cider on demand!
Conclusion
In summary, this Homemade Apple Cider Recipe with Warm Fall Spices is not only easy to make but also a delightful way to celebrate the flavors of autumn. With its rich taste and customizable ingredients, it’s a perfect addition to your fall traditions. We invite you to try this recipe, share your feedback in the comments, and subscribe for more delicious updates!
FAQs
Q1: Can I make this cider in a slow cooker?
A1: Yes! Simply combine all ingredients in a slow cooker and cook on low for 6-8 hours.
Q2: How can I make this recipe vegan?
A2: This recipe is already vegan! Just ensure any sweeteners used are plant-based.
Q3: Can I use store-bought apple juice instead of fresh apples?
A3: While you can use store-bought juice, fresh apples provide a richer flavor and healthier benefits.
Q4: What is the best way to serve cider at a party?
A4: Serve in a large punch bowl with a ladle and offer various garnishes for guests to customize their drinks.
Q5: How can I adjust the spice levels?
A5: Feel free to add more or less of each spice according to your personal preference. Start with smaller amounts and adjust to taste!
Homemade Apple Cider Recipe with Warm Fall Spices
Ingredients
- For the Cider:
- Apples (8-10): A mix of sweet and tart varieties such as Honeycrisp, Granny Smith, and Fuji for depth of flavor.
- Water (12 cups): Fresh and filtered for the best taste.
- Brown Sugar (1 cup): Adds a rich sweetness; can be substituted with maple syrup or honey for a healthier option.
- Cinnamon Sticks (4): Essential for that warm spice flavor.
- Whole Cloves (1 tablespoon): Adds a fragrant aroma.
- Star Anise (2): Optional, but enhances the complexity of flavors.
- Nutritional Yeast (1 tablespoon): For a unique twist, adding a slight nutty flavor (optional).
Instructions
- Step 1: Prepare the Apples
- Start by washing your apples thoroughly to remove any wax or pesticide residues. Core and quarter them, but there’s no need to peel them; the skin adds color and nutrients to your cider.
Step 2: Combine Ingredients
- In a large pot, combine the quartered apples, water, brown sugar, cinnamon sticks, cloves, and star anise. Stir well to ensure the sugar dissolves.
Step 3: Simmer the Mixture
- Bring the mixture to a boil over medium-high heat. Once boiling, reduce the heat to low and let it simmer uncovered for about 2 hours. This slow cooking process allows the flavors to meld beautifully.
Step 4: Mash the Apples
- After simmering, use a potato masher to mash the apples gently. This step releases more flavor and juice from the apples, enhancing the cider’s richness.
Step 5: Strain the Cider
- Using a fine-mesh strainer or cheesecloth, strain the mixture into a large bowl or pitcher. Press down on the solids to extract as much liquid as possible. Discard the solids or compost them.
Step 6: Serve Warm
- Pour the warm apple cider into mugs, garnishing with orange slices or a sprinkle of cinnamon if desired. Enjoy the cozy flavors of fall!