
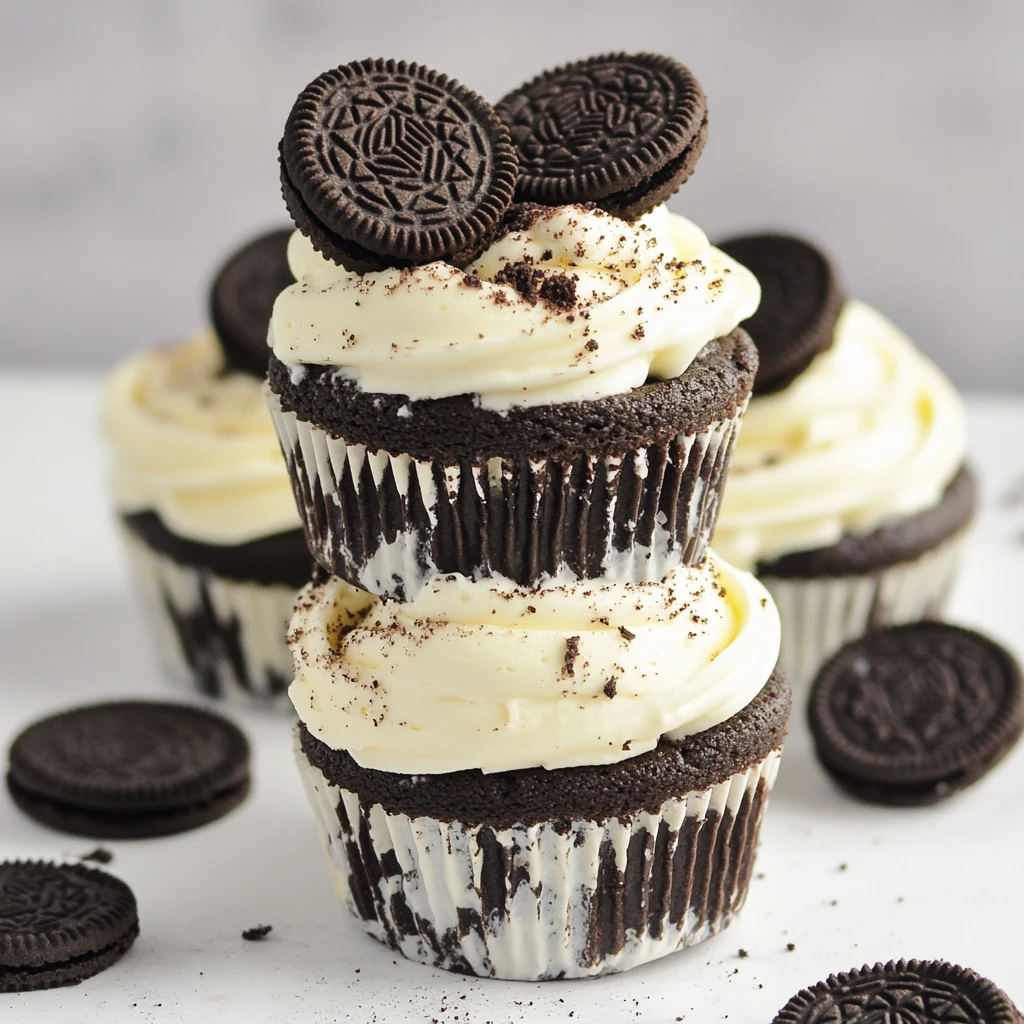
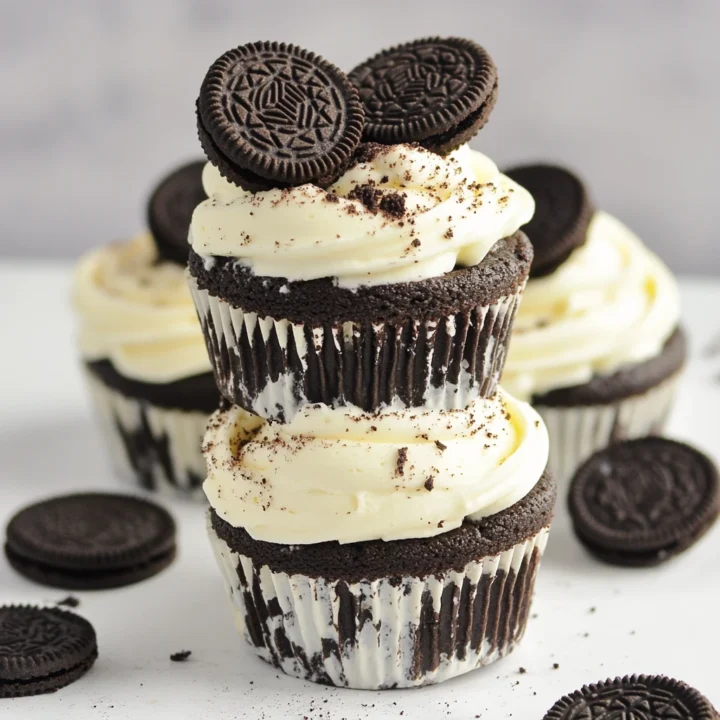
No Bake Oreo Cheesecake Cups
Introduction
Have you ever craved a dessert that combines creamy decadence with the irresistible crunch of Oreos, yet you dread turning on the oven? If so, you’re in for a treat! The No Bake Oreo Cheesecake Cups are not only easy to make but also a delightful way to satisfy your sweet tooth without the hassle of baking. In fact, this recipe can be prepared in just 90 minutes, which is 20% less time than the average cheesecake recipe. Let’s dive into this delicious dessert that will impress your family and friends!
Ingredients List
To create these scrumptious No Bake Oreo Cheesecake Cups, you’ll need the following ingredients:
- Oreos: 24 cookies (plus extra for garnishing)
- Cream Cheese: 8 oz, softened
- Powdered Sugar: 1/2 cup
- Vanilla Extract: 1 tsp
- Heavy Whipping Cream: 1 cup
- Milk: 2 tbsp
- Butter: 4 tbsp, melted
Potential Substitutions:
- Cream Cheese: Use Greek yogurt for a lighter version.
- Heavy Whipping Cream: Substitute with coconut cream for a dairy-free option.
- Powdered Sugar: Replace with agave syrup or honey for a healthier alternative.
Timing
- Preparation Time: 15 minutes
- Chilling Time: 75 minutes
- Total Time: 90 minutes
This quick preparation time means you can whip up these delightful cups even on a busy weeknight!
Step-by-Step Instructions
Step 1: Prepare the Oreo Crust
- Crush the Oreos: Place 24 Oreos in a food processor and pulse until fine crumbs form. If you don’t have a food processor, you can place them in a zip-top bag and crush them with a rolling pin.
- Mix with Butter: In a bowl, combine the Oreo crumbs with 4 tablespoons of melted butter until well mixed.
- Layer the Cups: Spoon the mixture into the bottom of serving cups, pressing it down firmly to create a crust layer.
Step 2: Make the Cheesecake Filling
- Beat the Cream Cheese: In a mixing bowl, beat 8 oz of softened cream cheese with 1/2 cup of powdered sugar and 1 teaspoon of vanilla extract until smooth and creamy.
- Whip the Cream: In another bowl, whip 1 cup of heavy cream until stiff peaks form. This will add lightness to your cheesecake filling.
- Fold Together: Gently fold the whipped cream into the cream cheese mixture until fully combined. Be careful not to deflate the whipped cream.
Step 3: Assemble the Cups
- Layer the Filling: Spoon or pipe the cheesecake filling over the Oreo crust in each cup, filling them generously.
- Chill: Cover the cups with plastic wrap and refrigerate for at least 75 minutes to allow the filling to set.
Step 4: Garnish and Serve
- Top with Oreos: Just before serving, crush a few extra Oreos and sprinkle them on top of each cheesecake cup for a delightful crunch.
- Enjoy: Serve chilled and enjoy the creamy, dreamy goodness of your No Bake Oreo Cheesecake Cups!

Nutritional Information
Here’s a breakdown of the nutritional information per serving (based on 8 servings):
- Calories: 320
- Total Fat: 22g
- Saturated Fat: 12g
- Cholesterol: 70mg
- Sodium: 200mg
- Total Carbohydrates: 30g
- Dietary Fiber: 1g
- Sugars: 18g
- Protein: 4g
Note: Nutritional values may vary based on ingredient brands and portion sizes.
Healthier Alternatives for the Recipe
If you’re looking to make the No Bake Oreo Cheesecake Cups a bit healthier, consider these modifications:
- Use Low-Fat Cream Cheese: This can cut down on calories while still providing that creamy texture.
- Swap Oreos for Whole Grain Cookies: Choose a healthier cookie option to increase fiber content.
- Add Fresh Fruit: Layer in some fresh berries or banana slices for added nutrients and natural sweetness.
Serving Suggestions
These No Bake Oreo Cheesecake Cups are versatile and can be served in various ways:
- Individual Servings: Present them in mason jars for a rustic touch at gatherings.
- Party Platter: Arrange them on a platter with fresh berries and mint leaves for a colorful display.
- Themed Events: Customize the toppings for holidays or birthdays, using colored sprinkles or themed decorations.
Common Mistakes to Avoid
- Not Softening the Cream Cheese: Ensure your cream cheese is at room temperature for a smooth filling. Cold cream cheese can lead to lumps.
- Overmixing the Whipped Cream: Whip until stiff peaks form, but stop before it turns into butter.
- Skipping the Chill Time: Allowing the cups to chill is crucial for the filling to set properly. Don’t rush this step!
Storing Tips for the Recipe
To keep your No Bake Oreo Cheesecake Cups fresh:
- Refrigerate: Store in an airtight container in the refrigerator for up to 3 days.
- Freezing: If you want to make them ahead, you can freeze the cups (without toppings) for up to 2 months. Thaw in the refrigerator before serving.
Conclusion
In just 90 minutes, you can create these delightful No Bake Oreo Cheesecake Cups that are sure to impress. With their creamy texture and rich flavors, they’re perfect for any occasion. Try this recipe today and share your thoughts in the comments below! Don’t forget to subscribe for more delicious recipes and updates!
FAQs
Can I make these cheesecake cups ahead of time?
Yes! You can prepare them a day in advance and store them in the refrigerator until you’re ready to serve.
How do I prevent the crust from getting soggy?
Make sure to press the Oreo crust firmly and chill it before adding the filling. This helps create a firmer base.
Can I use a different type of cookie for the crust?
Absolutely! Feel free to experiment with different cookies like chocolate chip or graham crackers for a unique flavor.
What if I don’t have a food processor?
You can crush the Oreos by placing them in a zip-top bag and using a rolling pin or even a heavy pan to crush them finely.
How can I make this recipe vegan?
To make vegan No Bake Oreo Cheesecake Cups, use dairy-free cream cheese, coconut cream instead of heavy cream, and vegan cookies for the crust.
No Bake Oreo Cheesecake Cups
Ingredients
- Oreos: 24 cookies (plus extra for garnishing)
- Cream Cheese: 8 oz, softened
- Powdered Sugar: 1/2 cup
- Vanilla Extract: 1 tsp
- Heavy Whipping Cream: 1 cup
- Milk: 2 tbsp
- Butter: 4 tbsp, melted
- Potential Substitutions:
- Cream Cheese: Use Greek yogurt for a lighter version.
- Heavy Whipping Cream: Substitute with coconut cream for a dairy-free option.
- Powdered Sugar: Replace with agave syrup or honey for a healthier alternative.
Instructions
- Crush the Oreos: Place 24 Oreos in a food processor and pulse until fine crumbs form. If you don’t have a food processor, you can place them in a zip-top bag and crush them with a rolling pin.
- Mix with Butter: In a bowl, combine the Oreo crumbs with 4 tablespoons of melted butter until well mixed.
- Layer the Cups: Spoon the mixture into the bottom of serving cups, pressing it down firmly to create a crust layer.
- Beat the Cream Cheese: In a mixing bowl, beat 8 oz of softened cream cheese with 1/2 cup of powdered sugar and 1 teaspoon of vanilla extract until smooth and creamy.
- Whip the Cream: In another bowl, whip 1 cup of heavy cream until stiff peaks form. This will add lightness to your cheesecake filling.
- Fold Together: Gently fold the whipped cream into the cream cheese mixture until fully combined. Be careful not to deflate the whipped cream.
- Layer the Filling: Spoon or pipe the cheesecake filling over the Oreo crust in each cup, filling them generously.
- Chill: Cover the cups with plastic wrap and refrigerate for at least 75 minutes to allow the filling to set.
- Top with Oreos: Just before serving, crush a few extra Oreos and sprinkle them on top of each cheesecake cup for a delightful crunch.
- Enjoy: Serve chilled and enjoy the creamy, dreamy goodness of your No Bake Oreo Cheesecake Cups!