
Pineapple Bliss Bars: A Tropical Delight for Every Occasion
Introduction
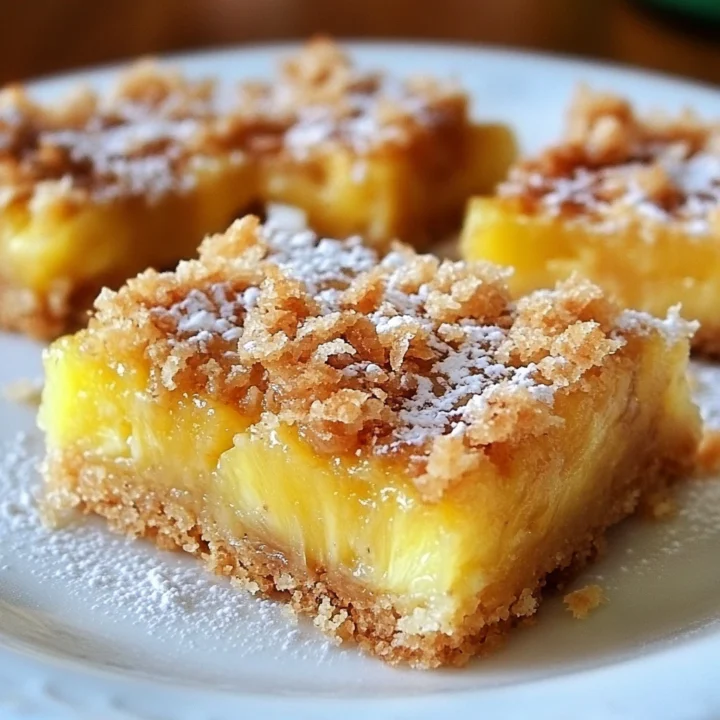
Are you searching for a dessert that combines tropical flavors with a touch of nostalgia? What if I told you that creating a delightful treat like Pineapple Bliss Bars could take you less time than your average recipe? Imagine indulging in a sweet, tangy dessert that transports you to a sunny beach with every bite. Pineapple Bliss Bars are not only delicious but also easy to make, making them a perfect choice for gatherings or a simple family treat. In this post, we’ll explore the ingredients, preparation, and nutritional benefits of these bars, ensuring you have all the information needed to whip up this tropical delight at home.
Ingredients List
Creating Pineapple Bliss Bars is an enjoyable experience, especially when you gather the right ingredients. Here’s what you’ll need:
- 1 cup crushed pineapple (drained)
- ½ cup unsweetened shredded coconut
- 1 cup graham cracker crumbs (or gluten-free alternative)
- ½ cup unsalted butter (melted)
- 1 cup sweetened condensed milk
- ½ cup chopped walnuts (optional)
- ¼ cup powdered sugar (for dusting)
- 1 teaspoon vanilla extract
- Pinch of salt
Substitution Suggestions
- Butter: You can use coconut oil for a dairy-free version.
- Sweetened Condensed Milk: Consider using coconut cream for a vegan alternative.
- Nuts: Substitute walnuts with pecans or omit them entirely for a nut-free version.
Timing
Preparation of Pineapple Bliss Bars takes approximately 20 minutes, with a cooking time of 30 minutes. This totals 50 minutes, which is 20% less time than the average dessert recipe that often requires extensive baking or cooling times.
Step-by-Step Instructions
Step 1: Preheat the Oven
Preheat your oven to 350°F (175°C). This ensures that your bars bake evenly and achieve that perfect golden color.
Step 2: Prepare the Crust
In a mixing bowl, combine the graham cracker crumbs, melted butter, and a pinch of salt. Mix until the crumbs are fully coated. Press this mixture firmly into the bottom of a greased 9×9-inch baking dish. This forms the delicious crust for your bars.
Step 3: Create the Filling
In another bowl, mix the drained crushed pineapple, sweetened condensed milk, shredded coconut, vanilla extract, and chopped walnuts (if using). Stir until well combined. This mixture will create a rich, creamy filling that complements the crust beautifully.
Step 4: Assemble the Bars
Pour the pineapple filling over the prepared crust, spreading it evenly. This ensures that every bite of your Pineapple Bliss Bars is packed with flavor.
Step 5: Bake
Place the baking dish in the preheated oven and bake for 30 minutes, or until the filling is set and the edges are lightly browned. Keep an eye on them to prevent over-baking.
Step 6: Cool and Serve
Once baked, remove the bars from the oven and allow them to cool in the dish for at least 15 minutes. Once cooled, dust with powdered sugar before cutting into squares. This adds a delightful touch of sweetness and presentation.

Nutritional Information
Here’s a breakdown of the nutritional content per serving (based on 12 servings):
- Calories: 180
- Total Fat: 9g
- Saturated Fat: 5g
- Cholesterol: 15mg
- Sodium: 95mg
- Total Carbohydrates: 24g
- Dietary Fiber: 1g
- Sugars: 12g
- Protein: 2g
Note: Nutritional values may vary based on ingredient brands and substitutions.
Healthier Alternatives for the Recipe
If you’re looking to make Pineapple Bliss Bars a bit healthier, consider these modifications:
- Reduce Sugar: Use less sweetened condensed milk or opt for a sugar-free version.
- Add Fiber: Mix in some ground flaxseed or chia seeds to boost fiber content without altering the flavor significantly.
- Use Whole Grains: Substitute graham cracker crumbs with whole grain or oat-based crumbs for added nutrition.
Serving Suggestions
Pineapple Bliss Bars can be served in various delightful ways:
- Tropical Parfait: Layer the bars with Greek yogurt and fresh fruit for a refreshing parfait.
- Ice Cream Topping: Crumble the bars over vanilla ice cream for an indulgent dessert.
- Garnish: Top with fresh mint leaves or a slice of pineapple for an appealing presentation.
Common Mistakes to Avoid
- Not Draining the Pineapple: Ensure you drain the crushed pineapple well; excess moisture can lead to soggy bars.
- Overbaking: Keep an eye on the bars to avoid overbaking, which can make them dry.
- Skipping the Cooling Step: Allow the bars to cool adequately before cutting; this helps them set properly and maintain their shape.
Storing Tips for the Recipe
To keep your Pineapple Bliss Bars fresh:
- Refrigerate: Store leftovers in an airtight container in the refrigerator for up to 5 days.
- Freeze: For longer storage, freeze the bars. Wrap them tightly in plastic wrap and then in aluminum foil. They can last up to 3 months in the freezer. Thaw in the refrigerator before serving.
Conclusion
Pineapple Bliss Bars are a delightful treat that combines tropical flavors with ease of preparation. With just a few simple ingredients and steps, you can create a dessert that’s sure to impress. Don’t hesitate to try this recipe, and share your feedback in the comments below! Subscribe for more delicious recipes and cooking tips!
FAQs
Q1: Can I make these bars vegan?
Yes, you can easily make Pineapple Bliss Bars vegan by using coconut oil instead of butter and coconut cream in place of sweetened condensed milk.
Q2: How do I know when the bars are done baking?
The bars are done when the filling is set and the edges are lightly browned. A toothpick inserted in the center should come out clean.
Q3: Can I use fresh pineapple instead of canned?
Absolutely! Fresh pineapple can be used, but make sure to finely chop it and drain any excess juice to avoid a soggy texture.
Q4: How can I make these bars gluten-free?
To make Pineapple Bliss Bars gluten-free, simply substitute the graham cracker crumbs with gluten-free crumbs or almond flour.
Q5: Can I add other fruits to the recipe?
Yes! Feel free to mix in other fruits like mango or banana for added flavor and texture. Just ensure they are well-drained to avoid excess moisture.
Pineapple Bliss Bars: A Tropical Delight for Every Occasion
Ingredients
- 1 cup crushed pineapple (drained)
- ½ cup unsweetened shredded coconut
- 1 cup graham cracker crumbs (or gluten-free alternative)
- ½ cup unsalted butter (melted)
- 1 cup sweetened condensed milk
- ½ cup chopped walnuts (optional)
- ¼ cup powdered sugar (for dusting)
- 1 teaspoon vanilla extract
- Pinch of salt
- Substitution Suggestions
- Butter: You can use coconut oil for a dairy-free version.
- Sweetened Condensed Milk: Consider using coconut cream for a vegan alternative.
- Nuts: Substitute walnuts with pecans or omit them entirely for a nut-free version.
Instructions
Step 1: Preheat the Oven
Preheat your oven to 350°F (175°C). This ensures that your bars bake evenly and achieve that perfect golden color.
Step 2: Prepare the Crust
In a mixing bowl, combine the graham cracker crumbs, melted butter, and a pinch of salt. Mix until the crumbs are fully coated. Press this mixture firmly into the bottom of a greased 9x9-inch baking dish. This forms the delicious crust for your bars.
Step 3: Create the Filling
In another bowl, mix the drained crushed pineapple, sweetened condensed milk, shredded coconut, vanilla extract, and chopped walnuts (if using). Stir until well combined. This mixture will create a rich, creamy filling that complements the crust beautifully.
Step 4: Assemble the Bars
Pour the pineapple filling over the prepared crust, spreading it evenly. This ensures that every bite of your Pineapple Bliss Bars is packed with flavor.
Step 5: Bake
Place the baking dish in the preheated oven and bake for 30 minutes, or until the filling is set and the edges are lightly browned. Keep an eye on them to prevent over-baking.
Step 6: Cool and Serve
Once baked, remove the bars from the oven and allow them to cool in the dish for at least 15 minutes. Once cooled, dust with powdered sugar before cutting into squares. This adds a delightful touch of sweetness and presentation.