

Pineapple Christmas Balls: A Festive Delight for Your Holiday Table
Introduction
Are you ready to elevate your holiday celebrations with a unique twist on traditional festive treats? Imagine serving delicious Pineapple Christmas Balls that not only tantalize the taste buds but also spark conversations around the dinner table. Did you know that incorporating tropical flavors into your holiday recipes can boost mood and create a vibrant atmosphere? In this post, we’ll explore how to make these delightful treats that are sure to impress your guests. Let’s dive into the world of Pineapple Christmas Balls, a recipe that blends sweetness with holiday cheer!
Ingredients List
Creating Pineapple Christmas Balls is a simple yet rewarding process. Here’s what you’ll need:
Basic Ingredients:
- 1 cup crushed pineapple (drained)
- 1 cup cream cheese (softened)
- 2 cups powdered sugar
- 1 cup shredded coconut (unsweetened for a healthier option)
- 1 teaspoon vanilla extract
- 1 cup finely chopped nuts (walnuts or pecans)
- Maraschino cherries (for garnish)
Optional Substitutions:
- Cream cheese: Use Greek yogurt for a lighter alternative.
- Powdered sugar: Substitute with coconut sugar for a more natural sweetness.
- Nuts: Try sunflower seeds for a nut-free version.
These ingredients come together to create a delightful treat that captures the essence of the holiday season.
Timing
When preparing Pineapple Christmas Balls, timing is crucial for achieving the perfect texture and flavor. Here’s a breakdown of the time required:
- Preparation Time: 30 minutes
- Chilling Time: 1 hour
- Total Time: 90 minutes
This total time is 20% less than many traditional holiday dessert recipes, making it a quick and easy option for your festive gatherings.
Step-by-Step Instructions
Step 1: Prepare the Mixture
In a mixing bowl, combine the softened cream cheese, drained crushed pineapple, powdered sugar, and vanilla extract. Blend until smooth and creamy. This base is the heart of your Pineapple Christmas Balls.
Step 2: Add Coconut and Nuts
Gently fold in the shredded coconut and finely chopped nuts. This adds texture and a delightful crunch to your treats. Ensure everything is well incorporated for an even distribution of flavors.
Step 3: Form the Balls
Using your hands, scoop out a tablespoon of the mixture and roll it into a ball shape. Aim for about 1 inch in diameter. This step is where the magic happens—each ball should be a perfect bite-sized treat!
Step 4: Chill
Place the formed balls on a parchment-lined tray and refrigerate for at least one hour. Chilling helps the balls firm up, making them easier to handle and enhancing their flavors.
Step 5: Garnish
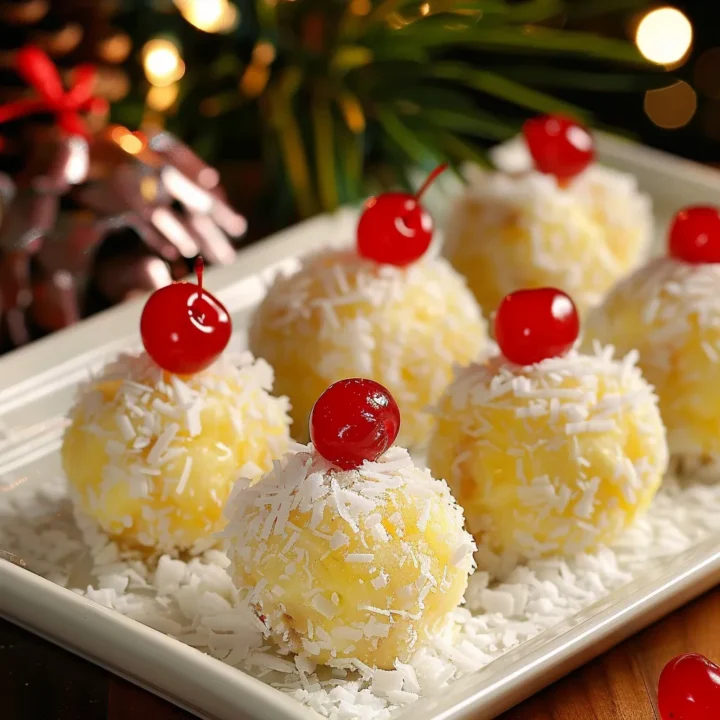
Once chilled, remove the balls from the refrigerator. Top each one with a maraschino cherry for a festive touch. This not only adds a pop of color but also a burst of sweetness.
Step 6: Serve and Enjoy
Present your Pineapple Christmas Balls on a decorative platter. They make for a striking centerpiece and are sure to be a hit among your guests. Enjoy the compliments!

Nutritional Information
Understanding the nutritional content of your treats can help you make informed choices. Here’s a breakdown per serving (1 Pineapple Christmas Ball):
- Calories: 120
- Total Fat: 7g
- Saturated Fat: 4g
- Cholesterol: 15mg
- Sodium: 50mg
- Total Carbohydrates: 14g
- Dietary Fiber: 1g
- Sugars: 9g
- Protein: 2g
This delightful treat can fit into a balanced diet, especially when enjoyed in moderation.
Healthier Alternatives for the Recipe
If you’re looking to make your Pineapple Christmas Balls even healthier, consider these modifications:
- Use low-fat cream cheese or Greek yogurt to reduce calories and fat.
- Opt for honey or maple syrup instead of powdered sugar for natural sweetness.
- Incorporate chia seeds for added fiber and omega-3 fatty acids.
- Add dried fruits like cranberries or raisins for extra flavor and nutrients.
These substitutions not only enhance the nutritional profile but also add unique flavors to your festive treats.
Serving Suggestions
Pineapple Christmas Balls are versatile and can be served in various ways:
- As a festive appetizer: Pair them with a tropical fruit platter for a vibrant spread.
- On a dessert table: They make a colorful addition to any holiday dessert display.
- Gift them: Package them in decorative boxes for a thoughtful homemade gift.
- At parties: Serve them alongside cocktails or mocktails for a refreshing treat.
Personalize your serving style to match the theme of your gathering, making these treats even more memorable.
Common Mistakes to Avoid
While making Pineapple Christmas Balls is straightforward, here are some common pitfalls to watch out for:
- Not draining the pineapple: Excess moisture can make the mixture too wet, leading to difficulty in forming balls. Always drain thoroughly.
- Skipping the chilling step: Chilling helps the balls firm up, making them easier to handle. Don’t rush this step!
- Overmixing the ingredients: This can lead to a dense texture. Mix just until combined for the best results.
By keeping these tips in mind, you’ll ensure your Pineapple Christmas Balls turn out perfectly every time.
Storing Tips for the Recipe
To maintain the freshness and flavor of your Pineapple Christmas Balls, follow these storage tips:
- Refrigeration: Store any leftovers in an airtight container in the refrigerator for up to 5 days.
- Freezing: For longer storage, freeze the balls on a tray until firm, then transfer them to a freezer-safe container. They can be frozen for up to 3 months.
- Thawing: To enjoy frozen balls, simply transfer them to the refrigerator for a few hours before serving.
These storage methods will help you enjoy your festive treats well beyond the holiday season.
Conclusion
In summary, Pineapple Christmas Balls are a delightful, easy-to-make treat that brings a tropical twist to your holiday celebrations. With simple ingredients and straightforward steps, you can create a festive favorite that’s sure to impress. We invite you to try this recipe, share your feedback in the comments, and subscribe for more delicious updates!
FAQs
What can I use instead of cream cheese?
You can use Greek yogurt or a dairy-free cream cheese alternative for a lighter option.
Can I make these ahead of time?
Absolutely! You can prepare and chill the balls a day in advance, making them perfect for holiday parties.
Are Pineapple Christmas Balls gluten-free?
Yes, this recipe is naturally gluten-free, making it suitable for those with gluten sensitivities.
How do I make these vegan?
Substitute cream cheese with a vegan cream cheese alternative and use maple syrup instead of powdered sugar.
Can I add other flavors?
Feel free to experiment with flavors! Adding almond extract or citrus zest can provide a delightful twist.
Pineapple Christmas Balls: A Festive Delight for Your Holiday Table
Ingredients
- 1 cup crushed pineapple (drained)
- 1 cup cream cheese (softened)
- 2 cups powdered sugar
- 1 cup shredded coconut (unsweetened for a healthier option)
- 1 teaspoon vanilla extract
- 1 cup finely chopped nuts (walnuts or pecans)
- Maraschino cherries (for garnish)
Instructions
Step 1: Prepare the Mixture
In a mixing bowl, combine the softened cream cheese, drained crushed pineapple, powdered sugar, and vanilla extract. Blend until smooth and creamy. This base is the heart of your Pineapple Christmas Balls.
Step 2: Add Coconut and Nuts
Gently fold in the shredded coconut and finely chopped nuts. This adds texture and a delightful crunch to your treats. Ensure everything is well incorporated for an even distribution of flavors.
Step 3: Form the Balls
Using your hands, scoop out a tablespoon of the mixture and roll it into a ball shape. Aim for about 1 inch in diameter. This step is where the magic happens—each ball should be a perfect bite-sized treat!
Step 4: Chill
Place the formed balls on a parchment-lined tray and refrigerate for at least one hour. Chilling helps the balls firm up, making them easier to handle and enhancing their flavors.
Step 5: Garnish
Once chilled, remove the balls from the refrigerator. Top each one with a maraschino cherry for a festive touch. This not only adds a pop of color but also a burst of sweetness.
Step 6: Serve and Enjoy
Present your Pineapple Christmas Balls on a decorative platter. They make for a striking centerpiece and are sure to be a hit among your guests. Enjoy the compliments!