
Easy Ice Cream Sandwich Cake
Introduction
Have you ever wondered how a simple dessert can become the star of your next gathering? Imagine a delightful Easy Ice Cream Sandwich Cake that not only satisfies your sweet tooth but also impresses your guests. This recipe is not just another dessert; it’s a game-changer that challenges the notion that making a stunning cake requires hours in the kitchen. Did you know that with just a few ingredients and minimal prep time, you can create a delicious cake that rivals those from high-end bakeries? Let’s dive into this easy recipe that will have everyone asking for seconds!
Ingredients List
To create your Easy Ice Cream Sandwich Cake, gather the following ingredients:
- Ice Cream Sandwiches (12-16): Choose your favorite flavors, such as chocolate, vanilla, or mint.
- Whipped Topping (1 tub, about 8 oz): For a light and fluffy texture.
- Chocolate Syrup (1/2 cup): Adds a rich, decadent flavor.
- Sprinkles (1/2 cup): For a fun, colorful finish.
- Optional Add-ins:
- Fresh fruits (like strawberries or bananas) for a fruity twist.
- Nuts (like crushed almonds or walnuts) for added crunch.
Substitutions:
- Dairy-Free Ice Cream Sandwiches: Use non-dairy alternatives for a vegan version.
- Homemade Whipped Cream: Substitute with homemade whipped cream for a fresher taste.
Timing
- Preparation Time: 15 minutes
- Freezing Time: 4 hours (or overnight for best results)
- Total Time: 4 hours 15 minutes
This recipe takes approximately 20% less time than the average cake recipe, making it a quick and easy dessert option for any occasion!
Step-by-Step Instructions
Step 1: Gather Your Ingredients
Start by collecting all your ingredients to ensure a smooth preparation process. This will save you time and keep your workspace organized.
Step 2: Layer the Ice Cream Sandwiches
- Action: In a 9×13 inch dish, lay out the ice cream sandwiches side by side. You can cut them in half if needed to fit.
- Tip: Arrange them tightly to minimize gaps, ensuring a solid base for your cake.
Step 3: Add the Whipped Topping
- Action: Spread a generous layer of whipped topping over the ice cream sandwiches.
- Tip: Use a spatula to create an even layer for a beautiful finish.
Step 4: Drizzle with Chocolate Syrup
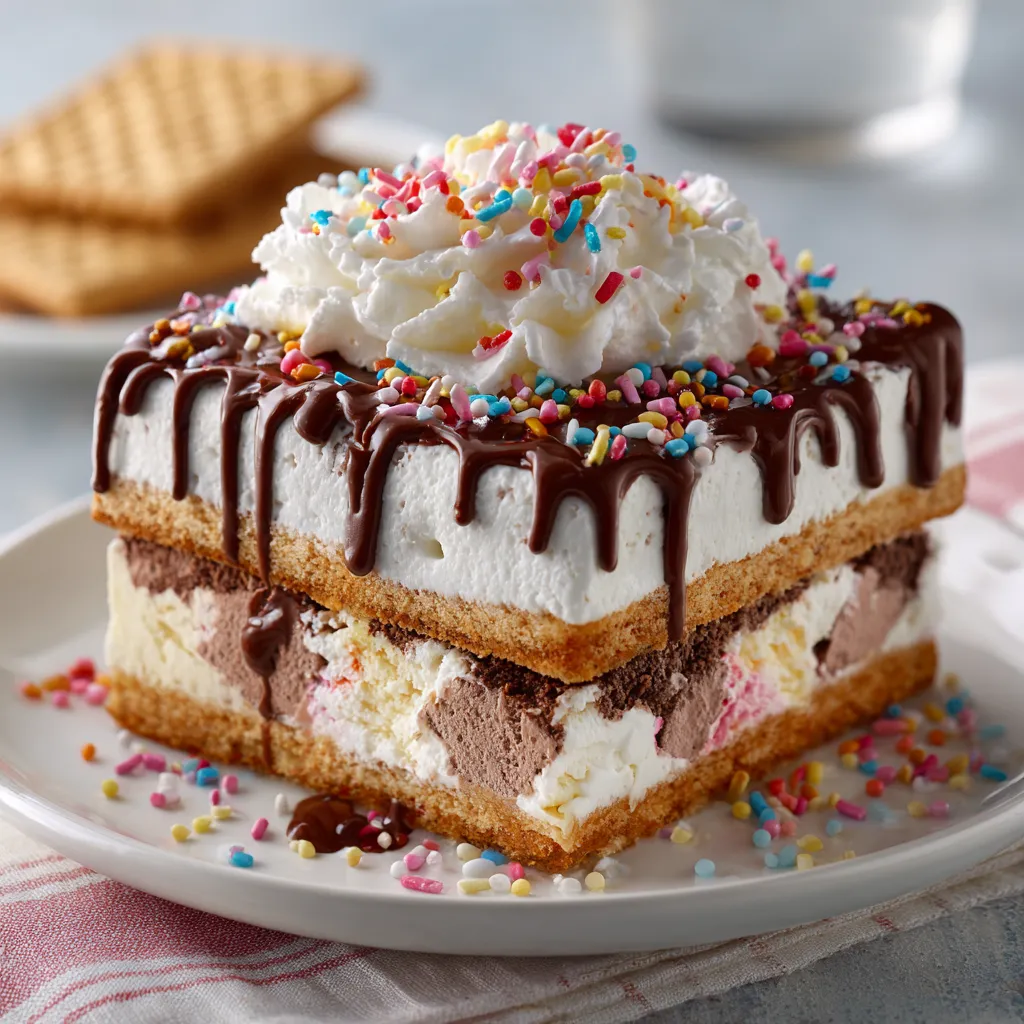
- Action: Drizzle chocolate syrup over the whipped topping.
- Tip: Get creative with your drizzle pattern; zigzag or swirl for a decorative touch.
Step 5: Sprinkle on the Fun
- Action: Add sprinkles (and any optional add-ins) on top of the chocolate syrup.
- Tip: Don’t be shy—this is where you can get colorful and festive!
Step 6: Freeze the Cake
- Action: Cover the dish with plastic wrap and place it in the freezer for at least 4 hours, preferably overnight.
- Tip: This allows the flavors to meld and the cake to firm up.
Step 7: Serve and Enjoy!
- Action: Once frozen, remove the cake from the freezer, cut into squares, and serve.
- Tip: Let it sit for a few minutes at room temperature for easier slicing.
Nutritional Information
Here’s a breakdown of the nutritional information per serving (based on 12 servings):
- Calories: 250
- Total Fat: 12g
- Saturated Fat: 7g
- Cholesterol: 30mg
- Sodium: 150mg
- Total Carbohydrates: 35g
- Dietary Fiber: 1g
- Sugars: 20g
- Protein: 3g
Insights:
This dessert is indulgent but can be enjoyed in moderation as part of a balanced diet.
Healthier Alternatives for the Recipe
If you’re looking to lighten up your Easy Ice Cream Sandwich Cake, consider these healthier alternatives:
- Use Low-Fat Ice Cream Sandwiches: Opt for lower-calorie options without sacrificing flavor.
- Greek Yogurt Instead of Whipped Topping: This adds protein and reduces sugar.
- Fresh Fruits: Incorporate fruits like berries or bananas for natural sweetness and added nutrients.
Serving Suggestions
To elevate your Easy Ice Cream Sandwich Cake, here are some creative serving ideas:
- Garnish with Fresh Berries: Serve with a side of fresh strawberries or raspberries for a burst of flavor.
- Pair with Coffee or Tea: The rich flavors of the cake complement warm beverages perfectly.
- Create a Dessert Bar: Set up a DIY dessert bar with toppings like nuts, fruits, and syrups to let guests customize their slices.
Common Mistakes to Avoid
When making your Easy Ice Cream Sandwich Cake, keep these common pitfalls in mind:
- Not Freezing Long Enough: Ensure you freeze it for at least 4 hours; otherwise, it may be too soft to slice.
- Overloading on Toppings: While toppings are fun, too many can overwhelm the cake’s flavors.
- Using Soft Ice Cream Sandwiches: Make sure your ice cream sandwiches are firm for the best structure.
Storing Tips for the Recipe
To keep your Easy Ice Cream Sandwich Cake fresh:
- Store in the Freezer: Keep leftovers in an airtight container in the freezer.
- Wrap Well: Use plastic wrap or aluminum foil to prevent freezer burn.
- Consume Within One Week: For optimal freshness, enjoy your cake within a week.
Conclusion
Creating an Easy Ice Cream Sandwich Cake is not only simple but also a delightful way to impress your guests. With just a few ingredients and minimal prep time, you can whip up a dessert that everyone will love. Try this recipe today, and don’t forget to share your thoughts in the comments below or subscribe for more delicious updates!
FAQs
Q1: Can I make this cake in advance?
A1: Yes! It’s perfect for making ahead of time as it freezes well. Just ensure you cover it properly to maintain freshness.
Q2: What if I don’t have whipped topping?
A2: You can substitute it with homemade whipped cream or Greek yogurt for a healthier option.
Q3: Is this recipe suitable for kids?
A3: Absolutely! It’s a fun and easy dessert that kids can help make, and they’ll love the delicious results.
Q4: Can I use different flavors of ice cream sandwiches?
A4: Yes, feel free to mix and match flavors to create a unique cake that suits your taste!
Q5: How do I make this recipe gluten-free?
A5: Look for gluten-free ice cream sandwiches and ensure all other ingredients are gluten-free to accommodate dietary needs.
Easy Ice Cream Sandwich Cake
Ingredients
- Ice Cream Sandwiches (12-16): Choose your favorite flavors, such as chocolate, vanilla, or mint.
- Whipped Topping (1 tub, about 8 oz): For a light and fluffy texture.
- Chocolate Syrup (1/2 cup): Adds a rich, decadent flavor.
- Sprinkles (1/2 cup): For a fun, colorful finish.
- Optional Add-ins:
- Fresh fruits (like strawberries or bananas) for a fruity twist.
- Nuts (like crushed almonds or walnuts) for added crunch.
- Substitutions:
- Dairy-Free Ice Cream Sandwiches: Use non-dairy alternatives for a vegan version.
- Homemade Whipped Cream: Substitute with homemade whipped cream for a fresher taste.
Instructions
Step 1: Gather Your Ingredients
Start by collecting all your ingredients to ensure a smooth preparation process. This will save you time and keep your workspace organized.
Step 2: Layer the Ice Cream Sandwiches
- Action: In a 9x13 inch dish, lay out the ice cream sandwiches side by side. You can cut them in half if needed to fit.
- Tip: Arrange them tightly to minimize gaps, ensuring a solid base for your cake.
Step 3: Add the Whipped Topping
- Action: Spread a generous layer of whipped topping over the ice cream sandwiches.
- Tip: Use a spatula to create an even layer for a beautiful finish.
Step 4: Drizzle with Chocolate Syrup
- Action: Drizzle chocolate syrup over the whipped topping.
- Tip: Get creative with your drizzle pattern; zigzag or swirl for a decorative touch.
Step 5: Sprinkle on the Fun
- Action: Add sprinkles (and any optional add-ins) on top of the chocolate syrup.
- Tip: Don’t be shy—this is where you can get colorful and festive!
Step 6: Freeze the Cake
- Action: Cover the dish with plastic wrap and place it in the freezer for at least 4 hours, preferably overnight.
- Tip: This allows the flavors to meld and the cake to firm up.
Step 7: Serve and Enjoy!
- Action: Once frozen, remove the cake from the freezer, cut into squares, and serve.
- Tip: Let it sit for a few minutes at room temperature for easier slicing.