
Healthy Frozen Snack Bars Recipe
Introduction
Are you tired of reaching for unhealthy snacks that leave you feeling sluggish? What if I told you that you could whip up delicious healthy frozen snack bars in under 90 minutes, which is 20% less time than the average snack preparation? These bars are not only easy to make but also packed with nutrients that will energize your day. Let’s dive into this recipe that challenges the notion that healthy snacks can’t be tasty!
Ingredients List
To create your healthy frozen snack bars, gather the following ingredients:
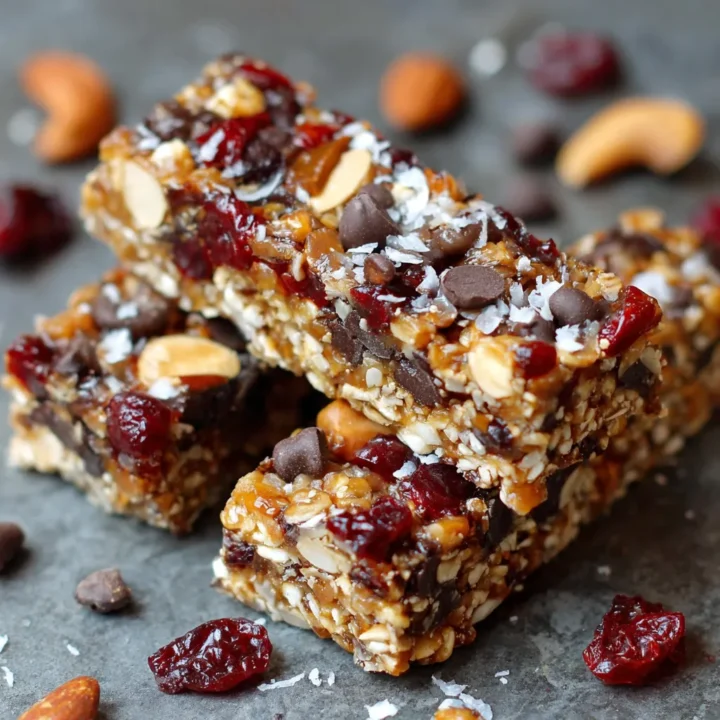
- 2 cups rolled oats: Provides a hearty base and fiber.
- 1 cup nut butter (peanut, almond, or cashew): For healthy fats and protein.
- 1/2 cup honey or maple syrup: Natural sweeteners that bind the ingredients.
- 1/2 cup dark chocolate chips: Adds a rich flavor while being lower in sugar.
- 1/2 cup chopped nuts (almonds, walnuts, or pecans): For crunch and additional nutrients.
- 1/2 cup dried fruits (raisins, cranberries, or apricots): A burst of sweetness and vitamins.
- 1/4 cup chia seeds or flaxseeds: Boosts omega-3 fatty acids and fiber.
Substitution Suggestions:
- Nut Butter: Use sunflower seed butter for a nut-free version.
- Sweetener: Agave syrup can replace honey for a vegan option.
- Dried Fruits: Fresh fruits like bananas or apples can be used if you prefer a fresher taste.
Timing
Preparation Time: 20 minutes
Freezing Time: 70 minutes
Total Time: 90 minutes
This is significantly less time than many traditional snack recipes, making it a quick and efficient option for busy schedules.
Step-by-Step Instructions
Step 1: Prepare Your Pan
Start by lining an 8×8-inch baking dish with parchment paper, leaving some overhang for easy removal later. This will ensure your bars come out easily and don’t stick.
Step 2: Mix the Dry Ingredients
In a large bowl, combine the rolled oats, chopped nuts, chia seeds, and dried fruits. Stir well to ensure even distribution. This step is crucial for flavor consistency.
Step 3: Combine the Wet Ingredients
In a separate bowl, mix the nut butter and honey (or maple syrup) until smooth. If your nut butter is too thick, consider warming it slightly in the microwave for about 15 seconds to make mixing easier.
Step 4: Combine Wet and Dry Mixtures
Pour the wet mixture into the dry ingredients. Stir until everything is well combined. The mixture should be sticky but not too runny. If it feels too dry, add a splash of water or more nut butter.
Step 5: Add Chocolate Chips
Gently fold in the dark chocolate chips, reserving a few to sprinkle on top for presentation. This adds a delightful touch and makes the bars visually appealing.
Step 6: Press the Mixture into the Pan
Transfer the mixture into the prepared baking dish. Press down firmly with a spatula or your hands to ensure it’s compact. This helps the bars hold together once frozen.
Step 7: Freeze
Cover the dish with plastic wrap and place it in the freezer for 70 minutes. This step is vital for achieving that perfect frozen texture.
Step 8: Cut and Serve
Once frozen, lift the bars out using the parchment paper. Cut into squares or rectangles, and enjoy! Store any leftovers in an airtight container in the freezer.

Nutritional Information
Here’s the nutritional breakdown per bar (based on 12 servings):
- Calories: 180
- Protein: 5g
- Carbohydrates: 20g
- Fat: 9g
- Fiber: 3g
- Sugar: 7g
This nutritional profile showcases a balance of macronutrients, making these bars a great snack option!
Healthier Alternatives for the Recipe
If you want to enhance the nutritional value of your healthy frozen snack bars, consider these alternatives:
- Use Protein Powder: Add a scoop of your favorite protein powder to increase protein content.
- Swap Sweeteners: Use stevia or monk fruit sweetener for a lower-calorie option.
- Incorporate Vegetables: Grated zucchini or carrot can be added for extra vitamins without altering the flavor significantly.
Serving Suggestions
Serve your healthy frozen snack bars as a quick breakfast, post-workout snack, or a delightful treat during movie night. Pair them with:
- Greek Yogurt: For added protein and creaminess.
- Fresh Fruit: Such as berries or banana slices for a refreshing touch.
- Nut Butter Drizzle: A light drizzle of melted nut butter enhances flavor and presentation.
Common Mistakes to Avoid
- Not Compacting the Mixture: Failing to press the mixture firmly can result in crumbly bars. Ensure it’s tightly packed.
- Overmixing: Mixing too much can lead to a dense texture. Stir just until combined.
- Skipping the Freezing Step: This is crucial for achieving the right texture; don’t rush it!
Storing Tips for the Recipe
To keep your healthy frozen snack bars fresh:
- Store in an Airtight Container: This prevents freezer burn and maintains flavor.
- Label with Dates: Use a marker to label the container with the date made, ensuring you consume them within a month for best quality.
- Pre-cut Portions: Cut them before freezing to make grabbing a snack easy and convenient.
Conclusion
In summary, these healthy frozen snack bars are a delicious, nutritious alternative to store-bought snacks. With simple ingredients and easy preparation, they’re perfect for any time of the day. Try the recipe today, share your feedback in the comments, and don’t forget to subscribe for more delicious updates!
FAQs
1. Can I use fresh fruits instead of dried fruits?
Yes, fresh fruits can be used, but they may alter the texture and require adjustments in freezing time.
2. How long do these bars last in the freezer?
When stored properly, these bars can last up to a month in the freezer.
3. Are these bars suitable for kids?
Absolutely! They are a healthy snack option for kids, providing energy and nutrients without excessive sugar.
4. Can I make these bars vegan?
Yes, simply replace honey with maple syrup and ensure your chocolate chips are dairy-free.
5. What can I do if the mixture is too dry?
If the mixture feels too dry, add a small amount of water or more nut butter to achieve the desired consistency.
Healthy Frozen Snack Bars Recipe
Ingredients
- 2 cups rolled oats: Provides a hearty base and fiber.
- 1 cup nut butter (peanut, almond, or cashew): For healthy fats and protein.
- 1/2 cup honey or maple syrup: Natural sweeteners that bind the ingredients.
- 1/2 cup dark chocolate chips: Adds a rich flavor while being lower in sugar.
- 1/2 cup chopped nuts (almonds, walnuts, or pecans): For crunch and additional nutrients.
- 1/2 cup dried fruits (raisins, cranberries, or apricots): A burst of sweetness and vitamins.
- 1/4 cup chia seeds or flaxseeds: Boosts omega-3 fatty acids and fiber.
- Substitution Suggestions:
- Nut Butter: Use sunflower seed butter for a nut-free version.
- Sweetener: Agave syrup can replace honey for a vegan option.
- Dried Fruits: Fresh fruits like bananas or apples can be used if you prefer a fresher taste.
Instructions
Step 1: Prepare Your Pan
Start by lining an 8x8-inch baking dish with parchment paper, leaving some overhang for easy removal later. This will ensure your bars come out easily and don’t stick.
Step 2: Mix the Dry Ingredients
In a large bowl, combine the rolled oats, chopped nuts, chia seeds, and dried fruits. Stir well to ensure even distribution. This step is crucial for flavor consistency.
Step 3: Combine the Wet Ingredients
In a separate bowl, mix the nut butter and honey (or maple syrup) until smooth. If your nut butter is too thick, consider warming it slightly in the microwave for about 15 seconds to make mixing easier.
Step 4: Combine Wet and Dry Mixtures
Pour the wet mixture into the dry ingredients. Stir until everything is well combined. The mixture should be sticky but not too runny. If it feels too dry, add a splash of water or more nut butter.
Step 5: Add Chocolate Chips
Gently fold in the dark chocolate chips, reserving a few to sprinkle on top for presentation. This adds a delightful touch and makes the bars visually appealing.
Step 6: Press the Mixture into the Pan
Transfer the mixture into the prepared baking dish. Press down firmly with a spatula or your hands to ensure it’s compact. This helps the bars hold together once frozen.
Step 7: Freeze
Cover the dish with plastic wrap and place it in the freezer for 70 minutes. This step is vital for achieving that perfect frozen texture.
Step 8: Cut and Serve
Once frozen, lift the bars out using the parchment paper. Cut into squares or rectangles, and enjoy! Store any leftovers in an airtight container in the freezer.